Pro Mosquitto Cloud – Getting Started Guide
1. Create a new client
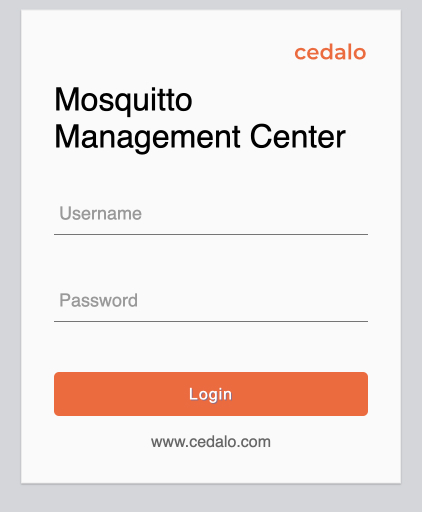
- In the getting started email you received from Cedalo, will be a link that directs you to the Mosquitto Management Center.
- Once you open the Mosquitto Management Center, type in the username and password provided in the email.
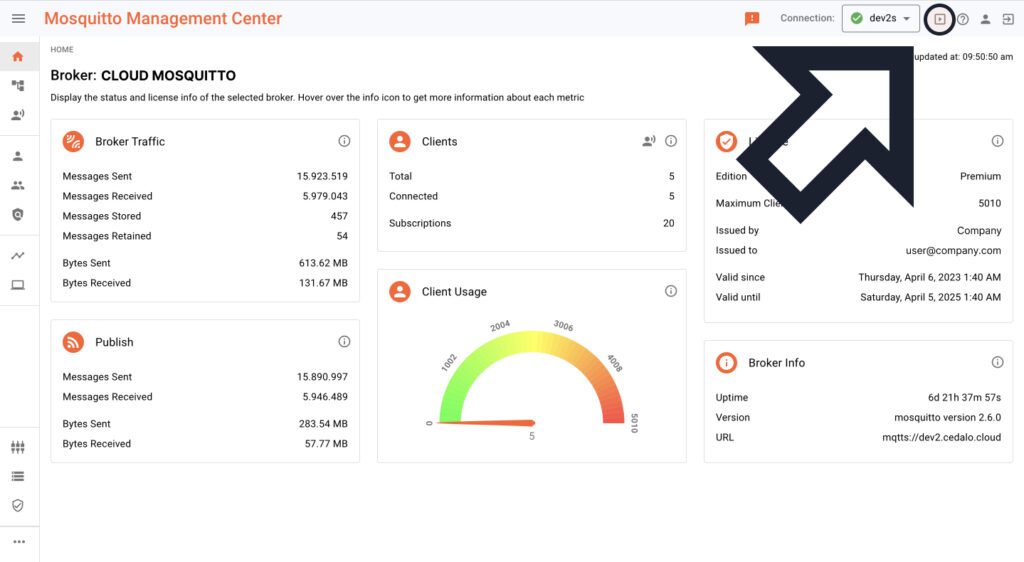
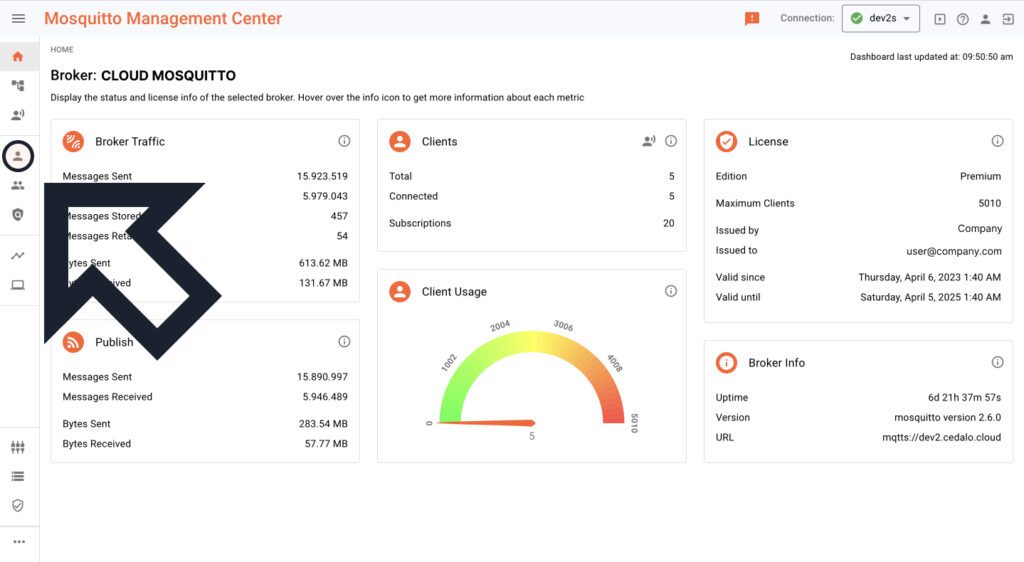
- After the login, you will be directed to your personal Mosquitto MQTT Management Center.
Note: we suggest starting with the tour to familiarize yourself with the Management Center.
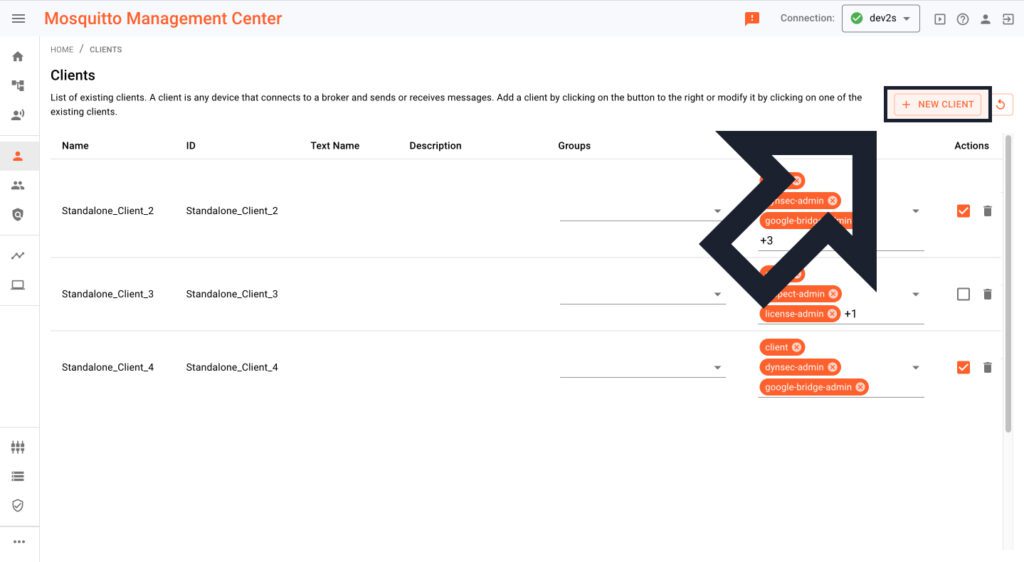
- On the left-hand side, you will find the “Clients” button. Click on it.
- Here you will need to create a new client. Click on the “NEW CLIENT” button.
- Now you will see a dialogue window where you can insert a Username, Password, Client ID, Text name, and Text description.
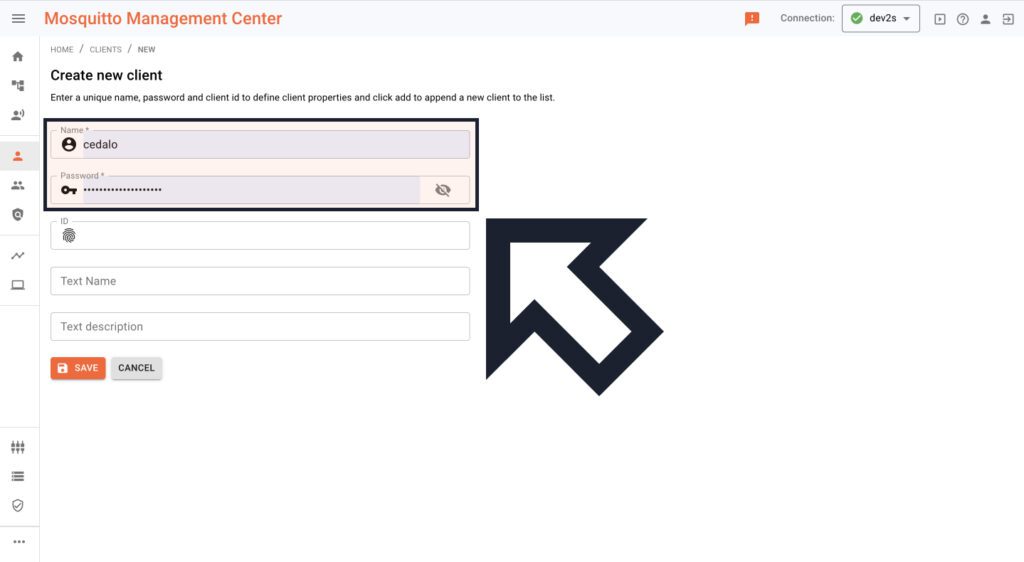
- You must create a new username and password if they have not been pre-filled by default.
- You can leave the Client ID, text name, and text description blank.
- Suppose you want to set up a Client ID. No problem. Make sure to add the Client ID later into the Client ID field in the advanced section of the MQTT Explorer.
- Click “Save.”
- Congratulations! You have just created a new client.
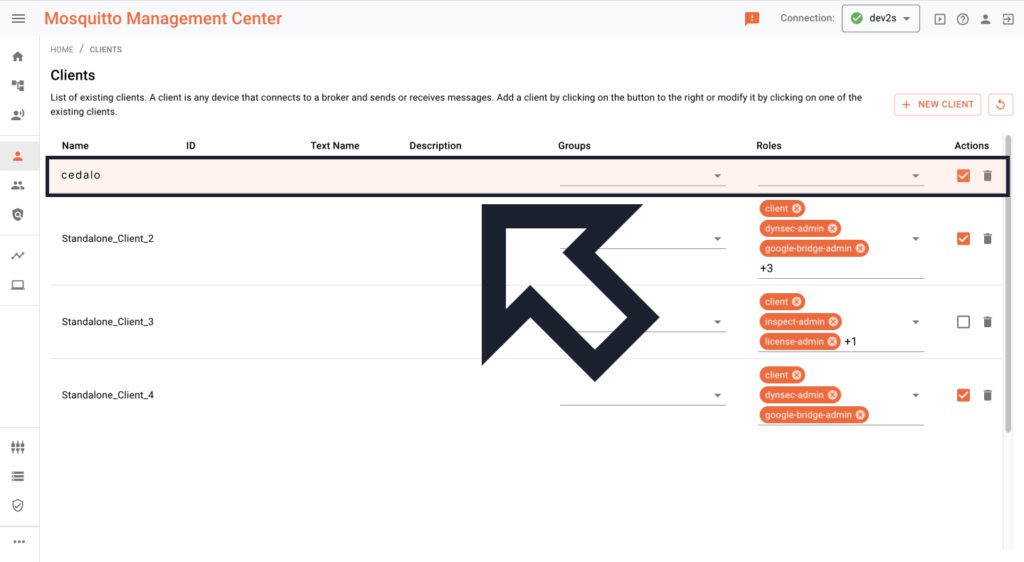
2. Add a role to your client
- Now that you have a client, it is time to add a role.
- Use the drop-down menu under “Roles” to select “Client” as a role.
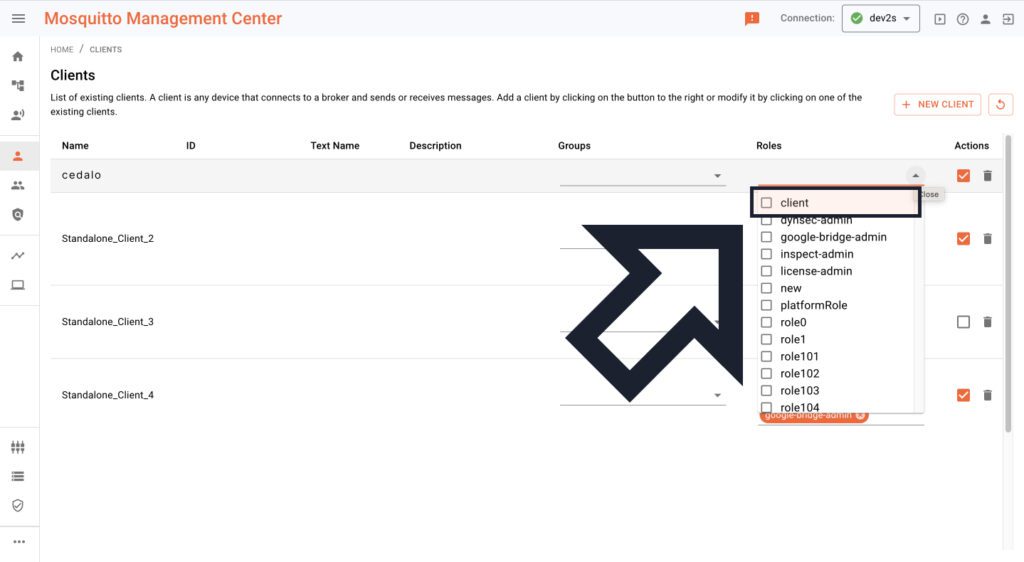
- By default, the clients with the “client” role can access every topic except “system topics.” Creating different roles enables you to maintain access authorizations.
- Here you will find more information about client roles.
- Now, you are ready to connect to your MQTT broker.
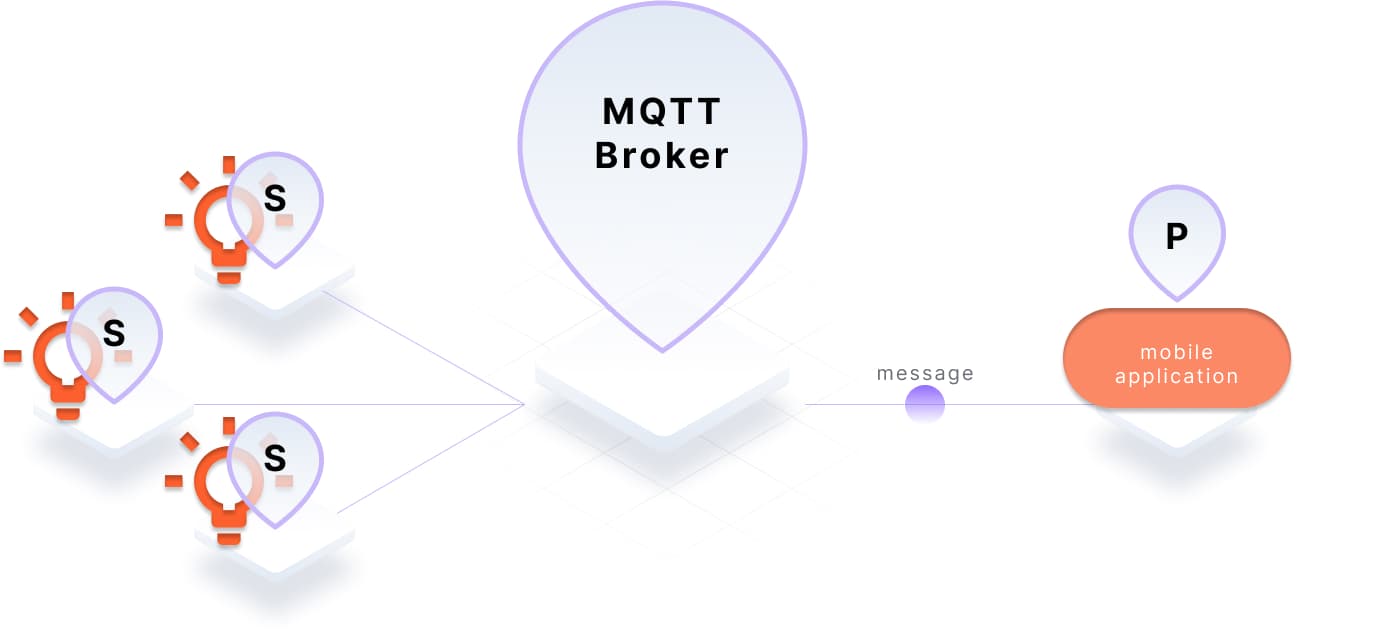
3. Connect your MQTT Broker
- For an easy start, we recommend you to download the MQTT Explorer: http://mqtt-explorer.com/
Attention! If you are using an Apple device, please use this link to download the MQTT Explorer!
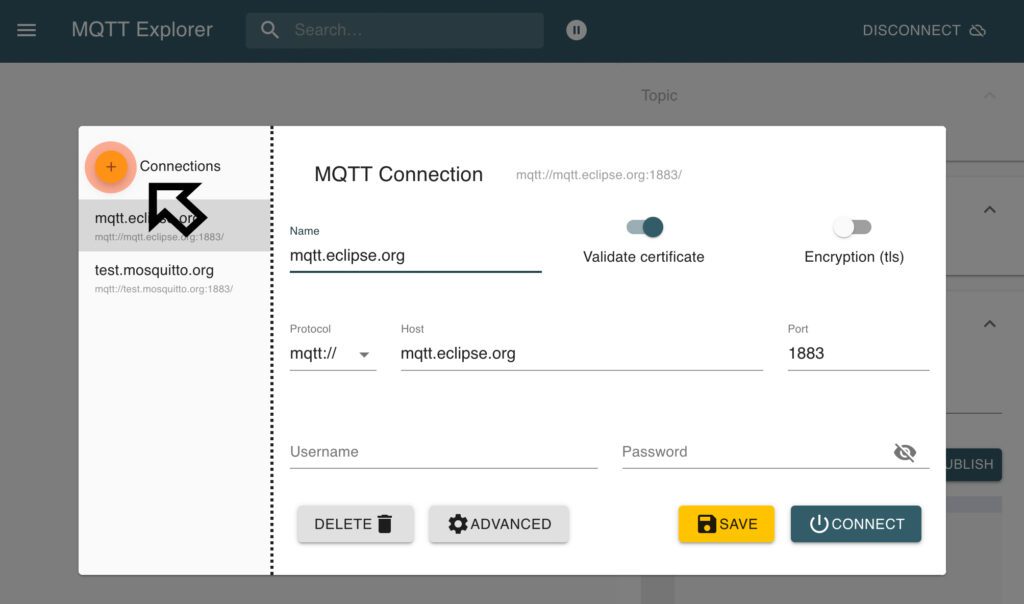
- Start the MQTT Explorer.
- Add a new Connection.
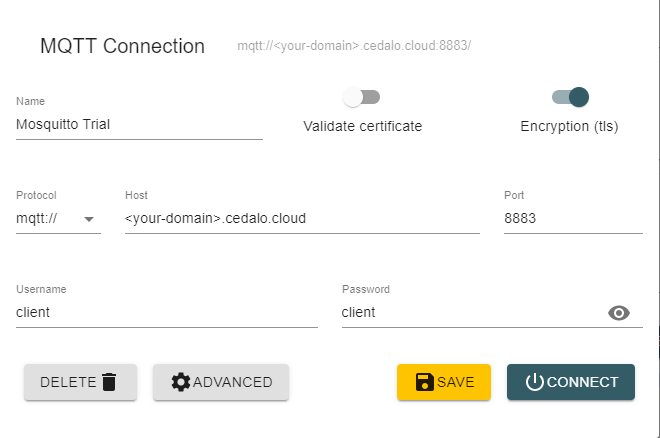
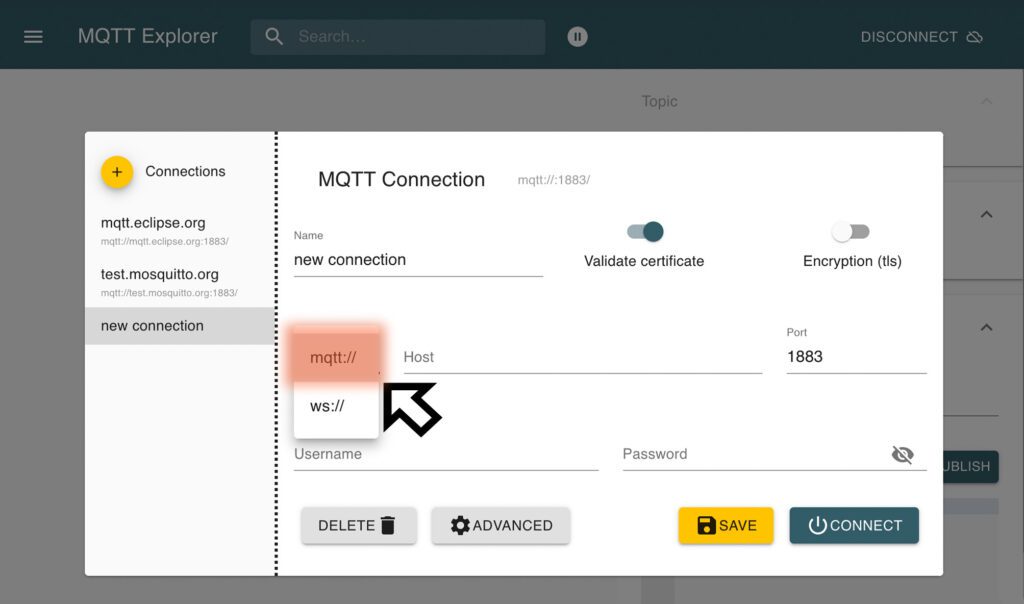
- Choose “MQTT” as “Protocol.”
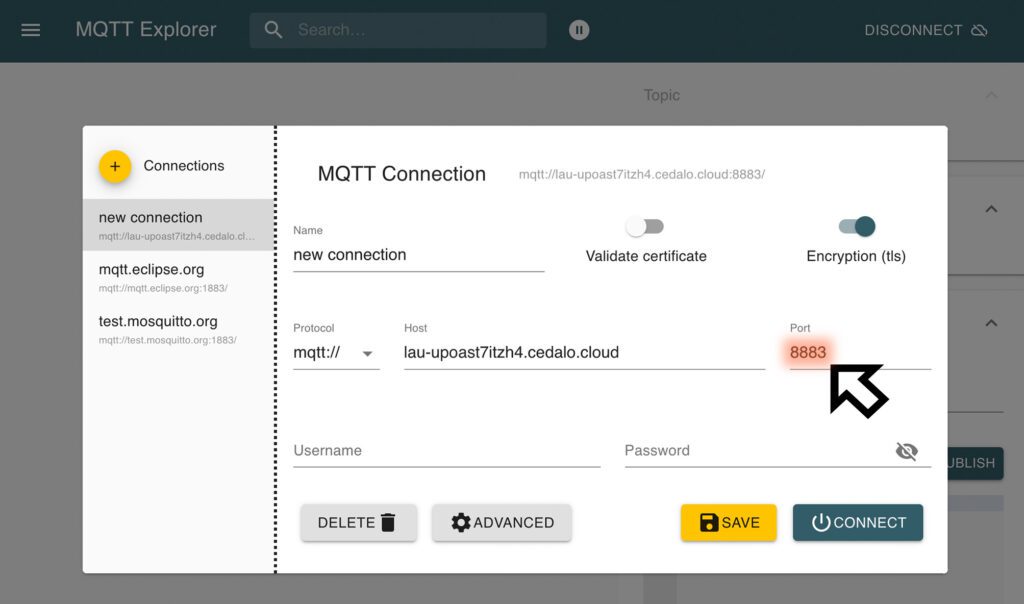
- Copy the “Endpoint URL” from your getting started email.
- Paste the “Endpoint URL” into the text field underneath “Protocol.”
Attention! Paste the endpoint URL without the source (mqtts://) and the port (:8883).

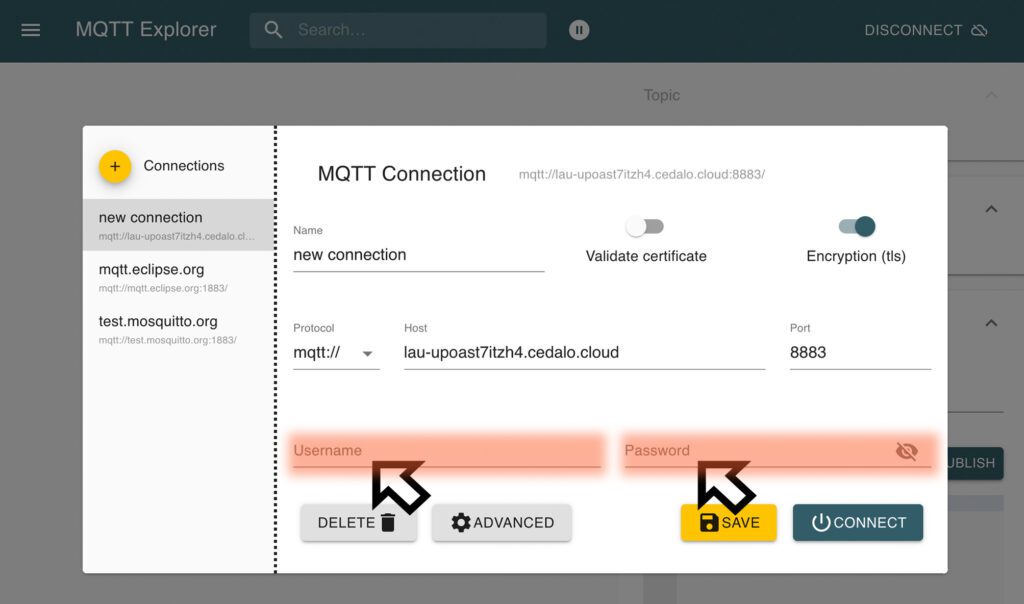
- Make sure that “Validate certificate” is switched off and “Encryption” is switched on.
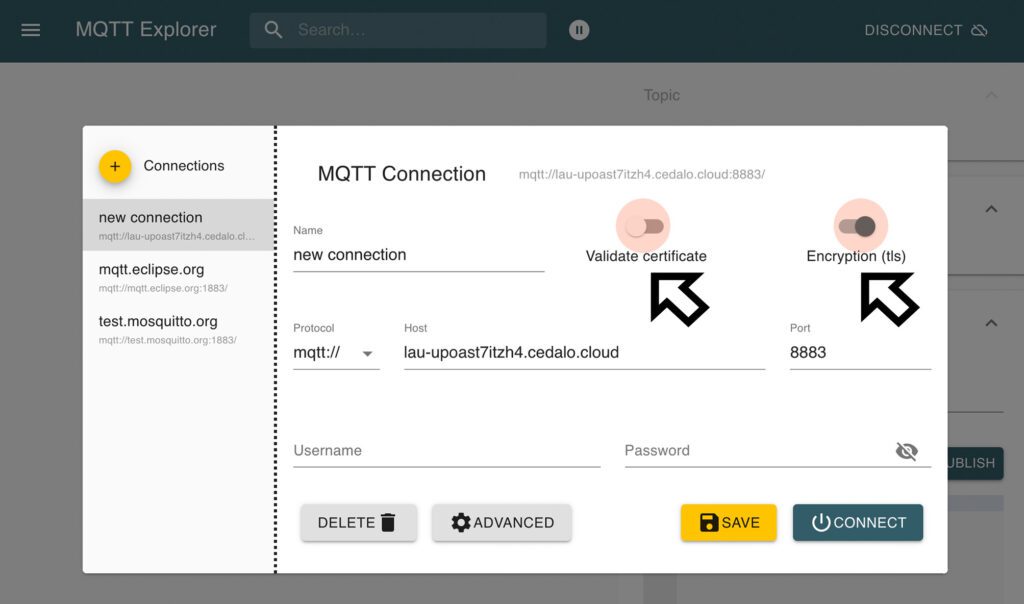
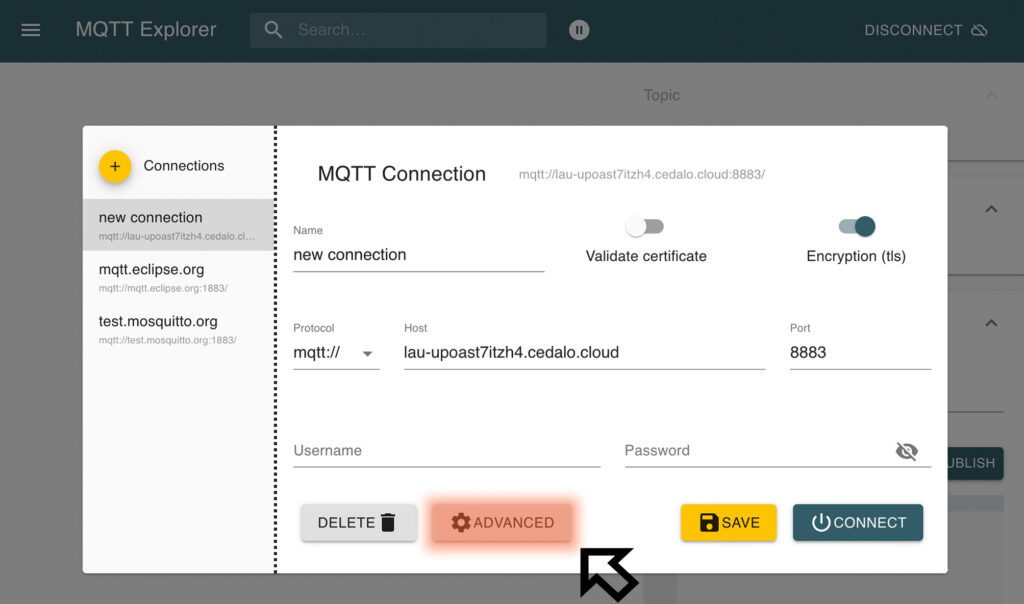
- Click on “ADVANCED.”
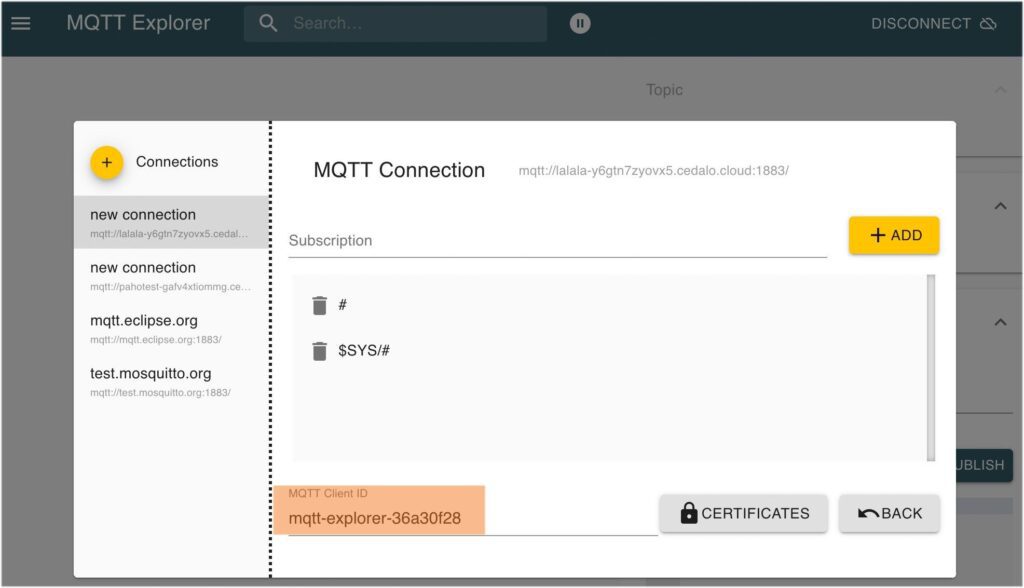
- Insert a “#” for the topic (underneath “Subscription”). “#” is a so-called wild card. You can learn more about wild cards here.
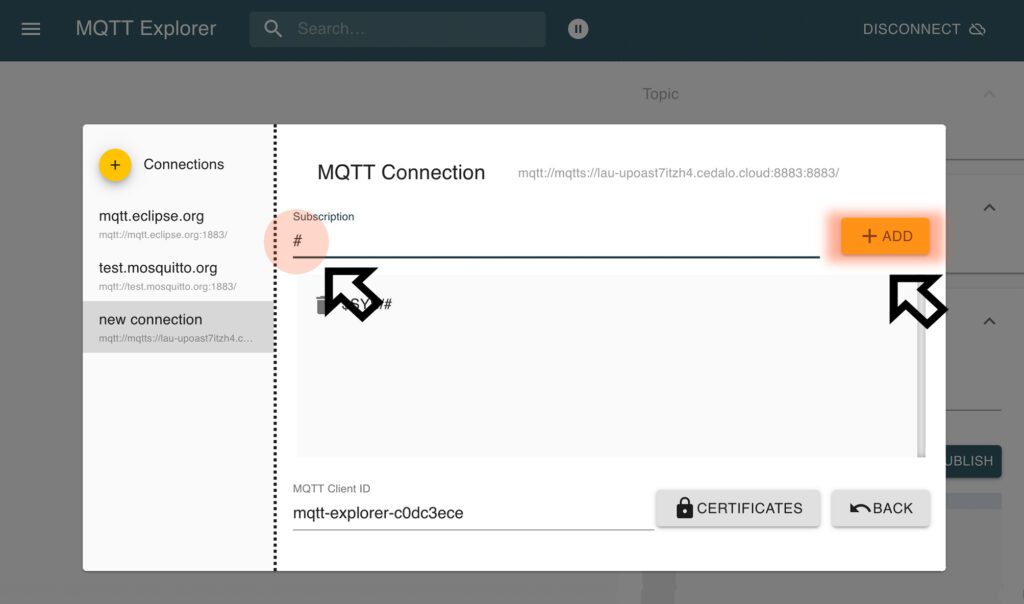
- If you set a Client ID earlier in the Management Center, you must also enter it here.
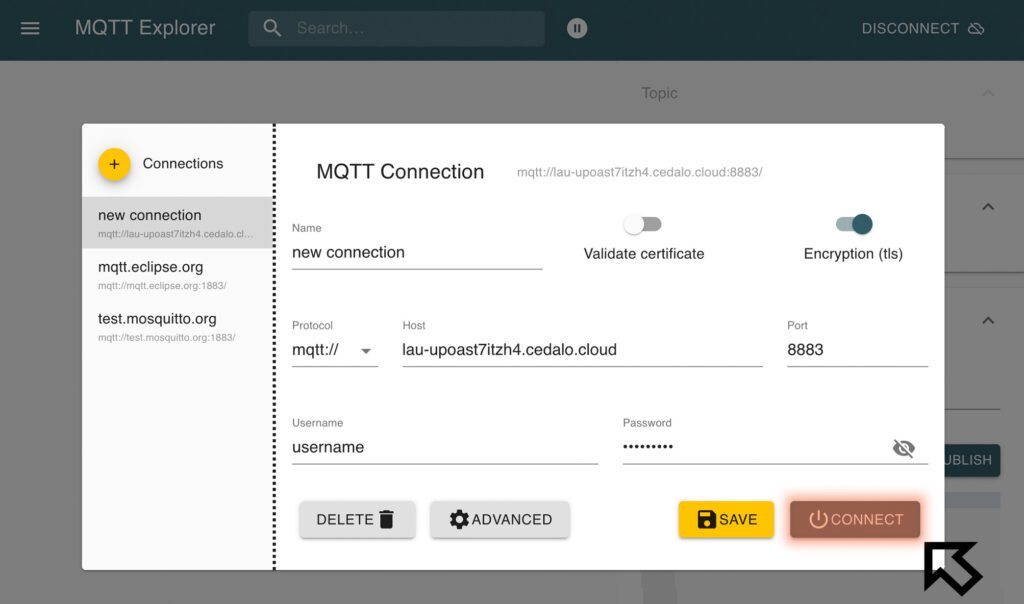
- Next, insert the username and password you set for the client in the Management Center from earlier.
- Click “CONNECT.”
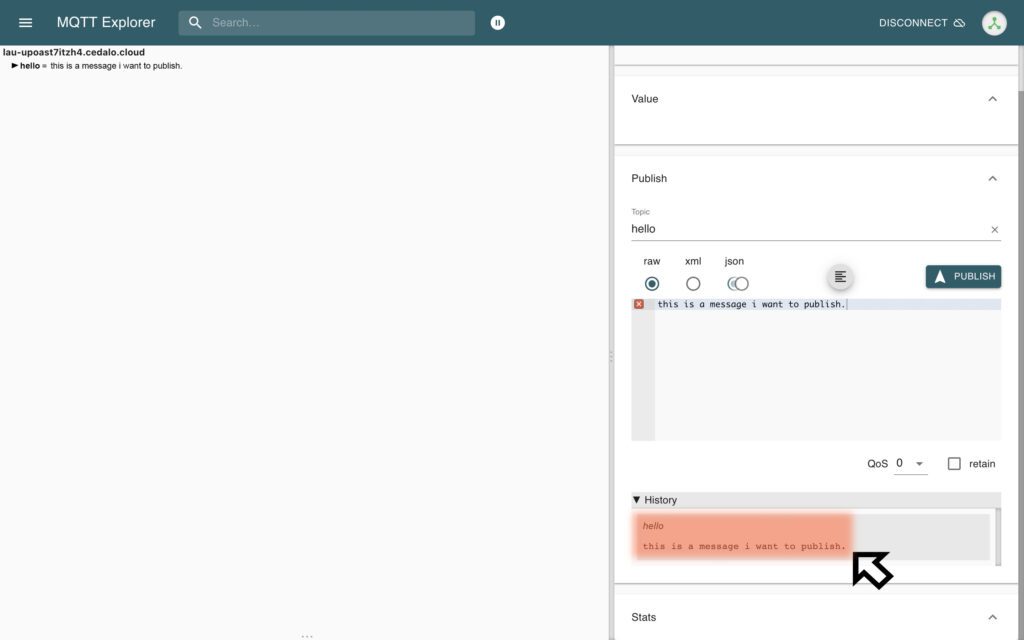
- Now, you are connected to your Pro Mosquitto broker and can start publishing messages.
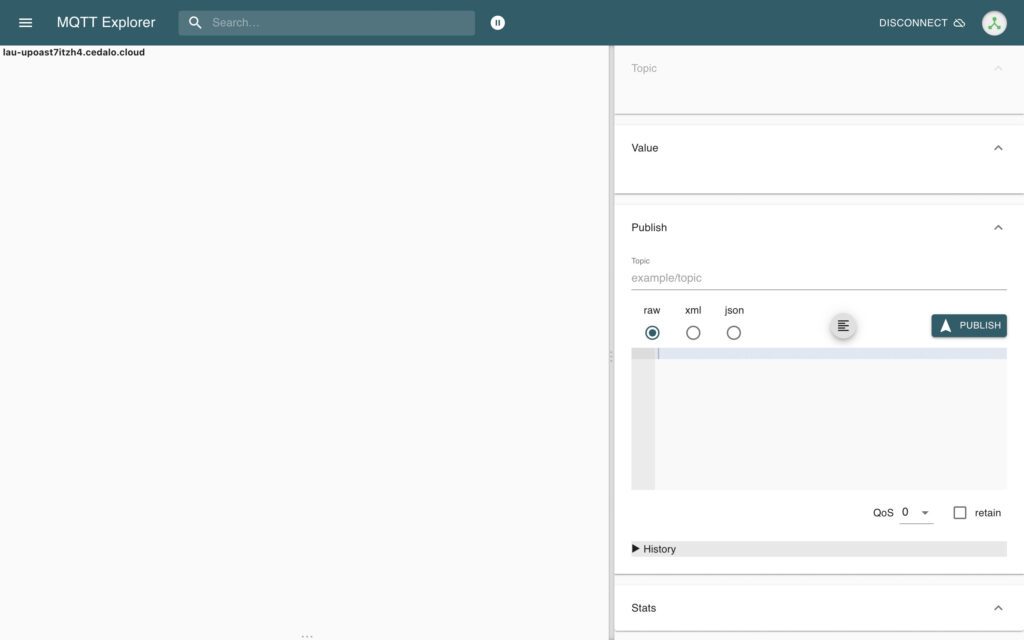
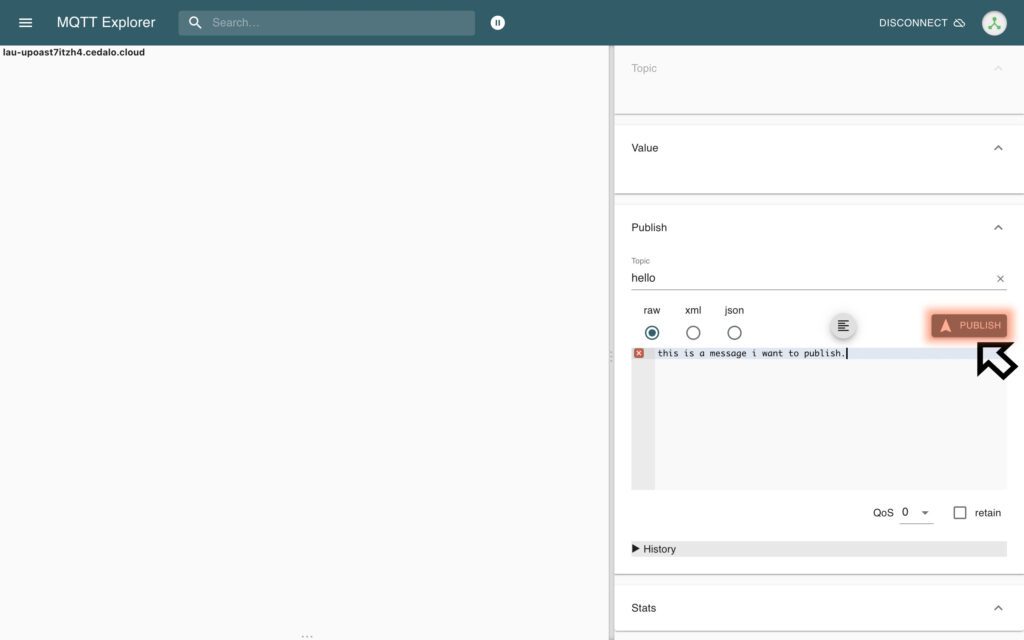
- Type a topic name into the “Topic” text field.
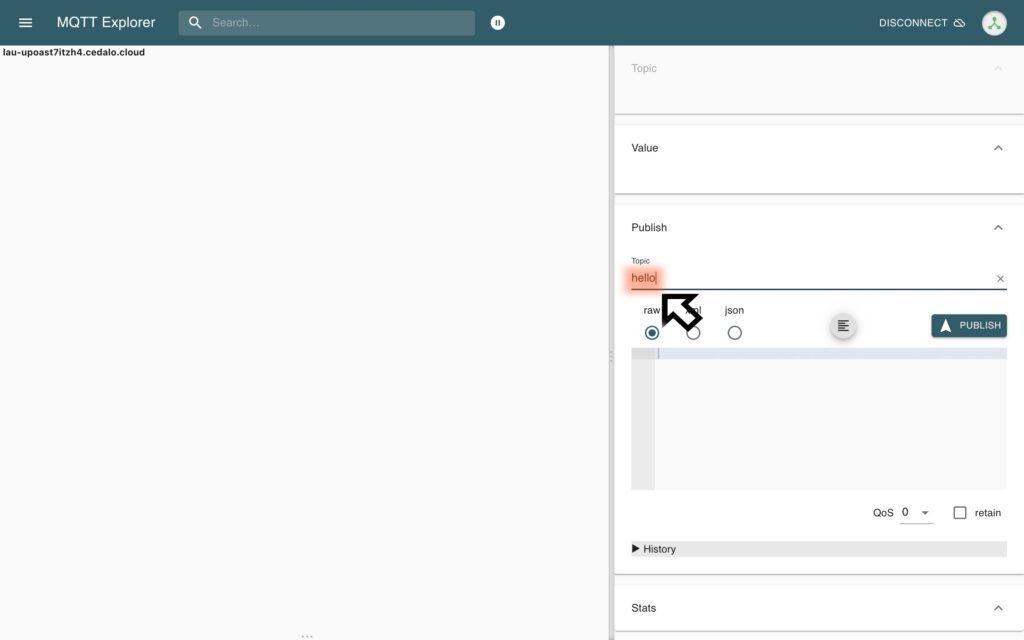
- Enter a message and choose the data type.
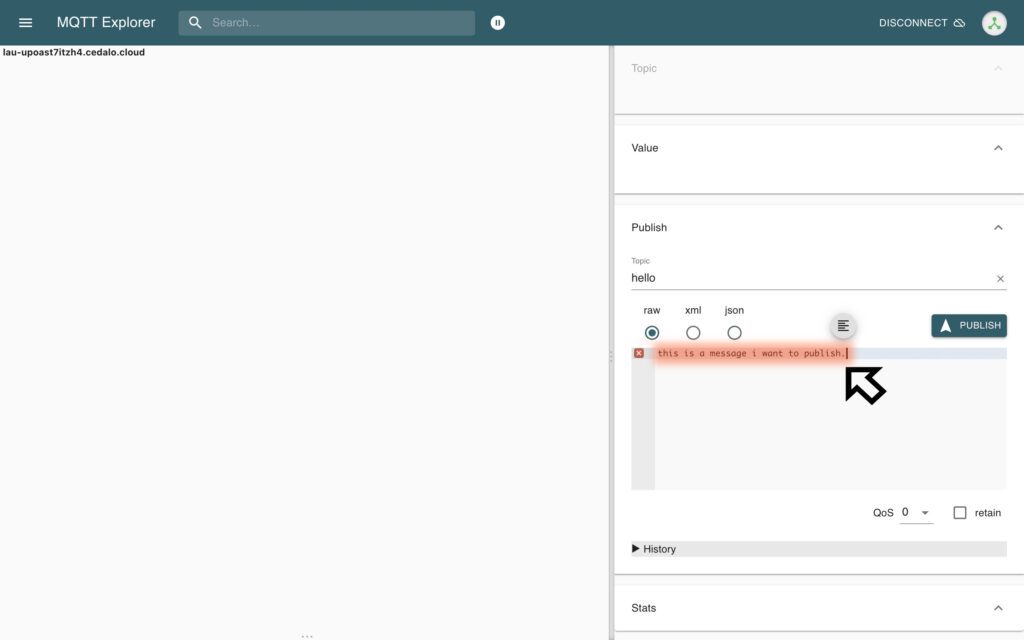
- Click “PUBLISH.”
- You have successfully created a client that you can use to publish messages and subscribe to topics.
4. Help and support
- Feel free to browse existing or create new topics on our forum.
- For any further questions, please email us at [email protected].
About the author
Laurenz Dallinger, a go-to expert for IoT use cases, problem-solving, and customer care, brings a wealth of experience to Cedalo's MQTT and IoT-focused blog. With a diverse professional background, including previous roles as an Application Engineer and a role explaining the digitization of the German health system, Laurenz is well-versed in navigating complex technological landscapes.
Beyond his professional pursuits, Laurenz is passionate about art and tirelessly conveys to customers that digitalization is akin to the canals of Venice. He likens it to the digital Canal Grande, emphasizing the importance of navigating the smaller canals—the intricacies of digital transformation.

Subscribe for monthly updates