
In today’s Internet of Things (IoT) world, achieving efficient communication among devices is essential, and protocols like MQTT play an important role. Specifically, MQTT is a publish-subscribe network protocol that transfers data with minimal bandwidth and low power usage.
Moreover, MQTT is supported by many programming languages, including Java, a common choice for building robust and scalable enterprise-grade applications. In this article, I will demonstrate how to utilize MQTT and the Mosquitto broker in your next Java project.
What is Java?
Java is a platform-independent and object-oriented programming language that allows developers to create applications that run across different platforms. Thanks to its robust nature and portability, it quickly became popular for building complex applications.
Java’s key strengths include:
- Platform independence: Java applications run on any device equipped with a Java virtual machine (JVM).
- Object-Oriented Programming (OOP): Java’s OOP design ensures modular, scalable, and reusable code.
- APIs and libraries: Java offers an extensive set of APIs and libraries, simplifying the development process.
- Multithreading: Java supports multithreading, enabling concurrent execution of multiple threads.
If you’re developing IoT solutions in PHP, check out this guide on integrating MQTT with Mosquitto.
Which Java MQTT library should you use?
When incorporating MQTT into a Java application, it’s essential to choose the right MQTT library. The library you select can significantly impact your application’s efficiency and reliability. Specifically, the ideal library offers robustness, thorough documentation, active maintenance, and compatibility with the project’s requirements.
Several Java MQTT libraries are available, each with its own set of features and ease of use. However, for this project, I will use the Eclipse Paho library.
The MQTT Paho Java library
The Eclipse Paho MQTT library provides comprehensive support for MQTT protocols, including versions 3.1 and 3.1.1. Moreover, it offers asynchronous and synchronous communication, making it suitable for various use cases. Due to its lightweight design, Paho ensures minimal resource consumption, making it ideal for IoT and other resource-constrained environments. If you’re interested in using the Paho MQTT Client Library with Rust, check out this guide.
Additionally, Eclipse Paho’s extensive documentation and active community presence simplifies MQTT integration into Java applications, enabling reliable and efficient messaging solutions. This article will demonstrate the library’s synchronous communication methods.
Project prerequisites: integrating MQTT in Java using Mosquitto
I will walk you through creating a simple Mosquitto-Java application that demonstrates basic MQTT functions: connect, publish, subscribe, and disconnect.
The project will use the Pro Edition for Eclipse Mosquitto™ broker, with the Java application acting as an MQTT client. It will handle both publishing and subscribing, and will communicate with a second client, implemented through the mosquitto_pub and mosquitto_sub utilities.
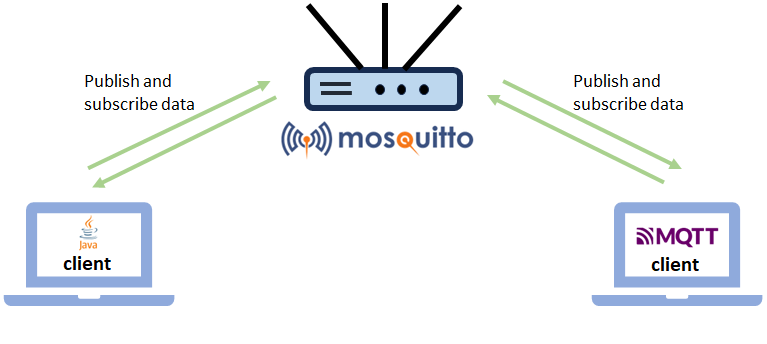
Figure 1 - Project structure with a Broker and two clients.
Before starting the project, you must install the necessary tools and perform some configurations. This project will run on the Ubuntu operating system, version 22.04 (Jammy Jellyfish).
Firstly, install a Java Integrated Development Environment (IDE) to develop the application. I recommend using one of Java’s most popular IDEs: IntelliJ IDEA Community Edition. Since the official tutorial covers the installation process thoroughly, I will not document it here.
After installing the IDE, it’s time to create and configure the project. To launch the Java IDE, either type intellij-idea-ultimate in the Terminal and press “Enter,” or click the icon in the Ubuntu sidebar (Figure 2):
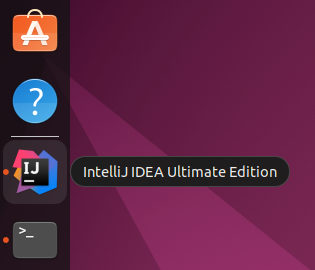
Figure 2 - IntelliJ IDEA launch icon.
Once IntelliJ IDEA starts, create a new project by entering a project name and selecting Maven as the build system. Then, click “Create” to generate the project (Figure 3).
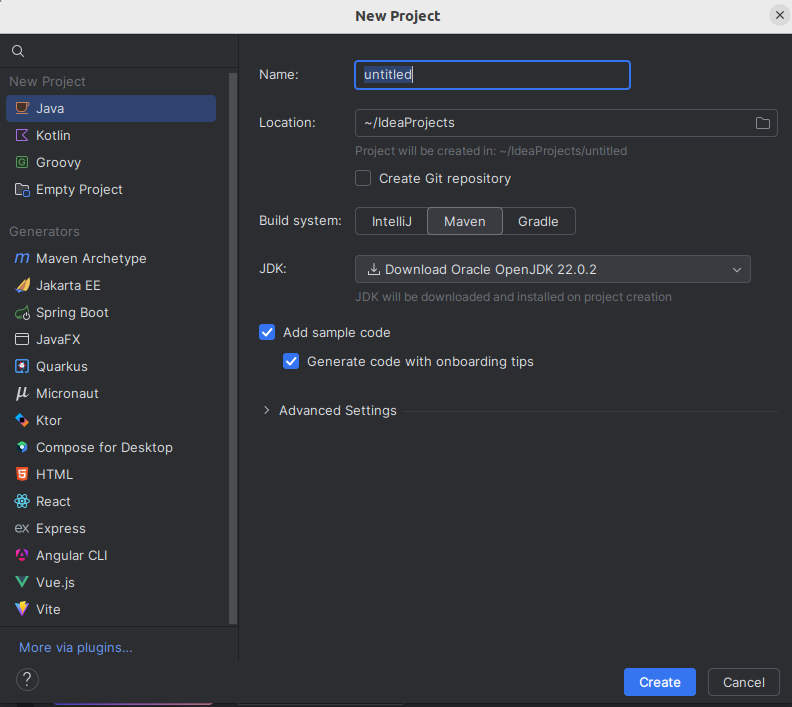
Figure 3 - New project using the Maven build system.
The next step is configuring the project dependencies, specifically the Paho library. You’ll need to add the necessary dependencies in the pom.xml file generated during the project setup.
Firstly, configure the Paho library repository by adding a repository tag with the correct link, as shown below.
<repositories>
   <repository>
       <id>Maven Repository</id>
       <url>https://repo.maven.apache.org/maven2/</url>
   </repository>
   <repository>
       <id>Eclipse Paho Repository</id>
       <url>https://repo.eclipse.org/content/repositories/paho-releases/</url>
   </repository>
</repositories>
Then, add the correct dependency. In this case, the MQTT library version 3.
<dependencies>
   <dependency>
       <groupId>org.eclipse.paho</groupId>
       <artifactId>org.eclipse.paho.client.mqttv3</artifactId>
       <version>1.2.5</version>
   </dependency>
</dependencies>
Now, you’ll need to set up a proper run configuration for the project. Add the necessary build configuration at the end of the pom.xml file.
<build>
   <plugins>
       <plugin>
           <groupId>org.codehaus.mojo</groupId>
           <artifactId>exec-maven-plugin</artifactId>
           <version>3.3.0</version>
           <executions>
               <execution>
                   <goals>
                       <goal>exec</goal>
                   </goals>
               </execution>
           </executions>
           <configuration>
               <mainClass>org.example.Main</mainClass>
           </configuration>
       </plugin>
   </plugins>
</build>
This configuration defines a new exec goal that directly triggers the execution of the Main class. Finally, the complete pom.xml file is as follows:
<?xml version="1.0" encoding="UTF-8"?>
<project xmlns="http://maven.apache.org/POM/4.0.0"
        xmlns:xsi="http://www.w3.org/2001/XMLSchema-instance"
        xsi:schemaLocation="http://maven.apache.org/POM/4.0.0 http://maven.apache.org/xsd/maven-4.0.0.xsd">
   <modelVersion>4.0.0</modelVersion>


   <groupId>org.example</groupId>
   <artifactId>MqttProject</artifactId>
   <version>1.0-SNAPSHOT</version>


   <repositories>
       <repository>
           <id>Maven Repository</id>
           <url>https://repo.maven.apache.org/maven2/</url>
       </repository>
       <repository>
           <id>Eclipse Paho Repository</id>
           <url>https://repo.eclipse.org/content/repositories/paho-releases/</url>
       </repository>
   </repositories>


   <properties>
       <maven.compiler.source>22</maven.compiler.source>
       <maven.compiler.target>22</maven.compiler.target>
       <project.build.sourceEncoding>UTF-8</project.build.sourceEncoding>
   </properties>


   <dependencies>
       <dependency>
           <groupId>org.eclipse.paho</groupId>
           <artifactId>org.eclipse.paho.client.mqttv3</artifactId>
           <version>1.2.5</version>
       </dependency>
   </dependencies>


   <build>
       <plugins>
           <plugin>
               <groupId>org.codehaus.mojo</groupId>
               <artifactId>exec-maven-plugin</artifactId>
               <version>3.3.0</version>
               <executions>
                   <execution>
                       <goals>
                           <goal>exec</goal>
                       </goals>
                   </execution>
               </executions>
               <configuration>
                   <mainClass>org.example.Main</mainClass>
               </configuration>
           </plugin>
       </plugins>
   </build>


</project>
To link the build goal to a run configuration, click Run > Edit Configurations and create a new configuration.
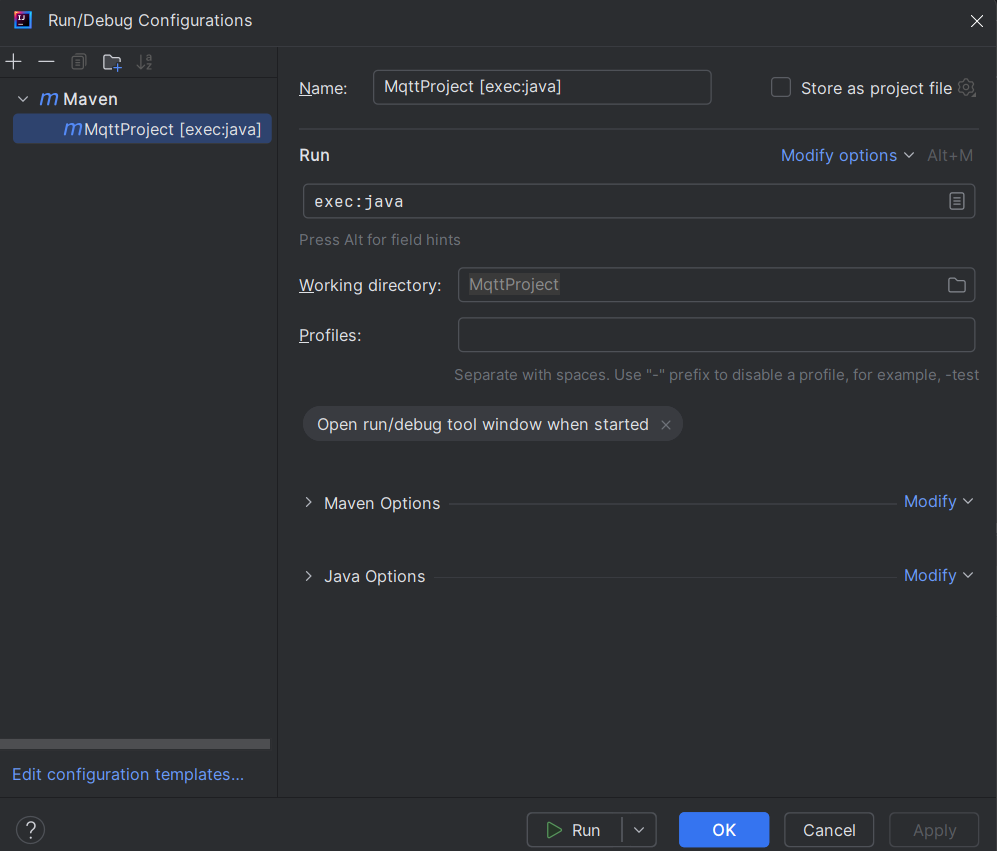
Figure 4 - Defining a new run configuration using the “exec” goal.
Then, click “OK” to create the configuration.
The final step is to configure the MQTT broker. For this project, I will use the latest Pro Mosquitto on-premises trial license. You can request a free trial here. The trial period includes basic MQTT HA configuration and access to advanced features like Audit-Trail logging, among others.
Pro Mosquitto is set up using Docker Compose, and this guide assumes the Docker system is already installed. For a preliminary guide about Mosquitto and Docker, check the official documentation.
Writing the Java application
This section presents the complete application code, followed by an explanation of the most relevant parts:
package org.example;

import org.eclipse.paho.client.mqttv3.IMqttDeliveryToken;
import org.eclipse.paho.client.mqttv3.MqttCallback;
import org.eclipse.paho.client.mqttv3.MqttException;
import org.eclipse.paho.client.mqttv3.MqttMessage;
import org.eclipse.paho.client.mqttv3.MqttConnectOptions;
import org.eclipse.paho.client.mqttv3.MqttClient;

import java.io.IOException;

public class Main {

   public static void main(String[] args) {
       String mqttBroker = "tcp://localhost:1883";
       String mqttTopic = "/test/topic";
       String username = "JavaClient";
       String password = "JavaPass";
       String testMsg = "Hi from the Java application";
       int qos = 1;

       try {
           MqttClient mqttClient = new MqttClient(mqttBroker, "mqttClient");
           MqttConnectOptions mqttOptions = new MqttConnectOptions();
           mqttOptions.setUserName(username);
           mqttOptions.setPassword(password.toCharArray());
           mqttClient.connect(mqttOptions);

           if (mqttClient.isConnected()) {
               mqttClient.setCallback(new MqttCallback() {
                   @Override
                   public void messageArrived(String topic, MqttMessage message) throws Exception {
                       System.out.println("Received message: " + new String(message.getPayload()));
                   }
                   @Override
                   public void connectionLost(Throwable cause) {
                       System.out.println("Connection is lost: " + cause.getMessage());
                   }
                   @Override
                   public void deliveryComplete(IMqttDeliveryToken token) {
                       System.out.println("Message publish is complete: " + token.isComplete());
                   }
               });

               /* The client subscribe to a topic */
               mqttClient.subscribe(mqttTopic, qos);
               /* Preparing a message to be published */
               MqttMessage mqttMsg = new MqttMessage(testMsg.getBytes());
               mqttMsg.setQos(qos);
               /* A message is published on the same subscribed topic */
               mqttClient.publish(mqttTopic, mqttMsg);
           }

           /* Keep the application open, so that the subscribe operation can tested */
           System.out.println("Press Enter to disconnect");
           System.in.read();
           /* Proceed with disconnecting */
           mqttClient.disconnect();
           mqttClient.close();

       } catch (MqttException e) {
           e.printStackTrace();
       } catch (IOException e) {
           throw new RuntimeException(e);
       }
   }
}
How to connect to the Mosquitto MQTT broker using Java
To connect to the Mosquitto MQTT broker, you must set up the connection parameters and create an MqttClient instance:
String mqttBroker = "tcp://localhost:1883";
...
String username = "JavaClient";
String password = "JavaPass";

try {
    MqttClient mqttClient = new MqttClient(mqttBroker, "mqttClient");
    MqttConnectOptions mqttOptions = new MqttConnectOptions();
    mqttOptions.setUserName(username);
    mqttOptions.setPassword(password.toCharArray());
    mqttClient.connect(mqttOptions);

    if (mqttClient.isConnected()) {

       ...
In this snippet:
- The
mqttBrokerstring specifies the URL of the MQTT broker. Non-secure connection broker URLs must start withtcp://, while secure URLs must use the prefixssl://and the port number 8883 instead of 1883. - The
usernameandpasswordstrings contain the authentication credentials. - A
MqttClientobject is instantiated with the broker URL and client ID. MqttConnectOptionssets the connection options, including the username and password.- Finally, the
mqttClient.connect(mqttOptions)attempts to establish the connection using the specified options. - The implementation continues with the method
mqttClient.isConnected(), which verifies whether the broker connection was successful. In case of connection errors, no publish or subscribe operations are performed.
As previously mentioned, the MqttConnectOptions object handles client credentials, but this step is optional. If your project doesn’t require authentication, skip MqttConnectOptions and call the connect method without any parameters. However, it’s crucial to avoid anonymous connections in a production environment.
Java MQTT Publish example
The following code demonstrates how to publish a message:
String mqttTopic = "/test/topic";

...

String testMsg = "Hi from the Java application";
int qos = 1;

...

    MqttMessage mqttMsg = new MqttMessage(testMsg.getBytes());
    mqttMsg.setQos(qos);
    /* A message is published on the same subscribed topic */
    mqttClient.publish(mqttTopic, mqttMsg);
In this example:
- The
mqttTopicstring defines the topic of the message. - The
testMsgstring contains the message content. - The
qosvariable defines the message’s Quality of Service level. MqttMessageis a message object initialized with the message content.mqttMsg.setQos(qos)sets the QoS level for the message.- Finally,
mqttClient.publish(mqttTopic, mqttMsg)publishes the message on the specified topic.
Java MQTT Subscribe example
To receive messages from a specific topic, you must subscribe to it and define a callback to handle incoming messages:
int qos = 1;

...

if (mqttClient.isConnected()) {
   mqttClient.setCallback(new MqttCallback() {
       @Override
       public void messageArrived(String topic, MqttMessage message) throws Exception {
           System.out.println("Received message: " + new String(message.getPayload()));
       }
       @Override
       public void connectionLost(Throwable cause) {
           System.out.println("Connection is lost: " + cause.getMessage());
       }
       @Override
       public void deliveryComplete(IMqttDeliveryToken token) {
           System.out.println("Message publish is complete: " + token.isComplete());
       }
   });

   /* The client subscribe to a topic */
   mqttClient.subscribe(mqttTopic, qos);
In this part:
- The
qosvariable sets the subscription’s QoS level. mqttClient.setCallback(new MqttCallback() {...})defines the callback for handling incoming messages, connection loss, and delivery completion.- The
messageArrivedcallback is triggered when a message is received on a subscribed topic, and prints the message content. - The
connectionLostcallback is called if the connection to the broker is lost. - When a message delivery is complete, this calls the
deliveryCompletecallback.
- The
- Finally,
mqttClient.subscribe(mqttTopic, qos)subscribes to the specified topic with the given QoS level.
Time to Disconnect
After the publishing and subscribing operations, it’s essential to properly disconnect the client to free resources and maintain a clean state:
System.out.println("Press Enter to disconnect");
System.in.read();
mqttClient.disconnect();
mqttClient.close();
In this final part:
- The program waits for the Enter key to be pressed (
System.in.read()). mqttClient.disconnect()disconnects the client from the broker.mqttClient.close()releases any resources held by the client.
Testing the Java application using Mosquitto
Now, it’s time to test the application. I’ll verify its functionality by testing its ability to connect to the Mosquitto broker, publish messages, subscribe to a topic, and disconnect.
To do this, use the mosquitto_pub and mosquitto_sub command-line utilities.
Firstly, run the Pro Mosquitto broker to facilitate communication between Java and mosquitto pub sub clients. Again, you can find setup instructions on the official documentation page.
Once the Pro Mosquitto broker starts, configure the correct clients’ credentials through the Management Center for Mosquitto™. For this purpose, you’ll need to create two new clients: JavaClient with the password JavaPass for the Java application, and MosquittoClient with the password MosquittoPass for the mosquitto_pub and mosquitto_sub client utilities. For more information on creating client accounts, refer to this page.
Now, you can start a subscriber client using the mosquitto_sub utility with the terminal command:
mosquitto_sub -h localhost -t /test/topic -u MosquittoClient -P MosquittoPassThe subscriber will subscribe to the Pro Mosquitto broker over the topic /test/topic using the client MosquittoClient.
To run the application on the IntelliJ Idea IDE, click the Run 
/test/topic and publish the message “Hi from the Java application” on the same topic. The message will be visible in the subscriber terminal:
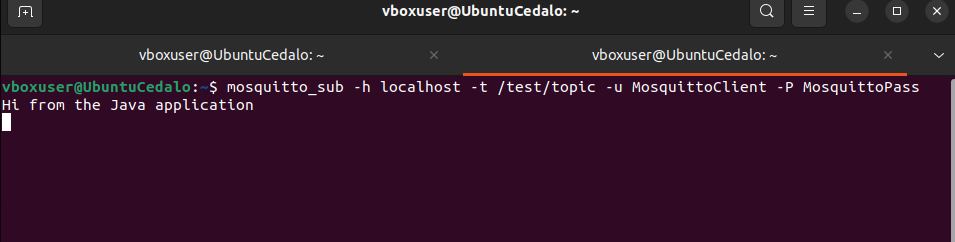
Figure 5 - The subscriber client visualizes the published message.
The Java application will also receive the same message since it is subscribing to the same topic:

Figure 6 - The IntelliJ IDE terminal shows the application logs.
The application now waits indefinitely for the Enter key to disconnect from the broker allowing you to test message publishing toward the Java application. Use the mosquitto_pub utility to publish a specific message with the command:
mosquitto_pub -h localhost -t /test/topic -u MosquittoClient -P MosquittoPass -m Publishing from Terminal’The following will appear in the IDE console:

Figure 7 - The published message is received from the Java application.
Conclusion
Integrating MQTT into Java using the Eclipse Paho library provides a robust foundation for developing IoT applications. The steps in this guide will enable your Java application to connect to the Mosquitto MQTT broker, publish messages, and subscribe to MQTT topics. This practical approach simplifies the implementation process and ensures efficient communication among your devices.
With Java’s robust features and MQTT’s lightweight nature, you are well-equipped to tackle complex IoT projects confidently. Consider exploring the trial version of the Pro Edition for Eclipse Mosquitto to build and refine your solution.


