
React Native combines two seemingly incompatible worlds: native mobile apps and JavaScript. It works as a renderer for the JavaScript framework React, which enables cross-platform apps for Android and iOS using just one codebase.
Mosquitto is a lightweight and efficient MQTT broker that plays a key role in IoT communication. By combining React Native and the pro version of the open-source Mosquitto, you can use mobile IoT communication for various use cases, such as real-time monitoring of environmental sensors, control and monitoring smart home devices, or energy monitoring and management in buildings. This article explores how React Native can create reactive mobile applications that communicate seamlessly with IoT devices via the Pro Edition for Eclipse Mosquitto.
What exactly is React Native?
React Native is an open-source framework from Facebook for mobile app development. It enables developers to create native mobile apps for iOS and Android in JavaScript and React. The result is a genuine native application that developers can publish on respective app stores rather than a web application that runs on a smartphone.
React Native follows the same patterns as React in the browser, providing an outstanding developer experience. An important feature is the so-called hot reloading, which immediately shows code changes in the app without having to rebuild or restart the app completely. React Native uses Expo, a set of tools and services that help set up and deploy the finished app. You can deploy a React Native app on an actual device or simulator during development with Expo’s support.
Installing and running React Native
React Native offers a setup wizard that prepares the application setup process, lowering the entry barrier to development with the framework.
Enter the command npx create-expo-app cedalo-react-native-mqtt, where cedalo-react-native-mqtt stands for the name of your app. The wizard will create the initial project structure, configure the build tools, and download all the necessary dependencies. Then, navigate to the directory and start your application.
Using npm start will start the interactive CLI of Expo, where you can select the environment to run your application:
- Android: with the “a” key. Alternatively, enter
npm run androidon the command line. - iOS: press “i” in the Expo CLI or
npm run ioson the regular command line to start the iOS simulator. - Web: the “w” key or the command
npm run webstarts the application in the browser. However, you must install additional dependencies such as react-native-web and the appropriate configuration with the @expo/webpack-config package for the web version.
Alternatively, install the Expo app on a mobile device and scan the QR code that Expo displays when using npm start (Figure 1). You can start developing as soon as you open the application, regardless of the environment.
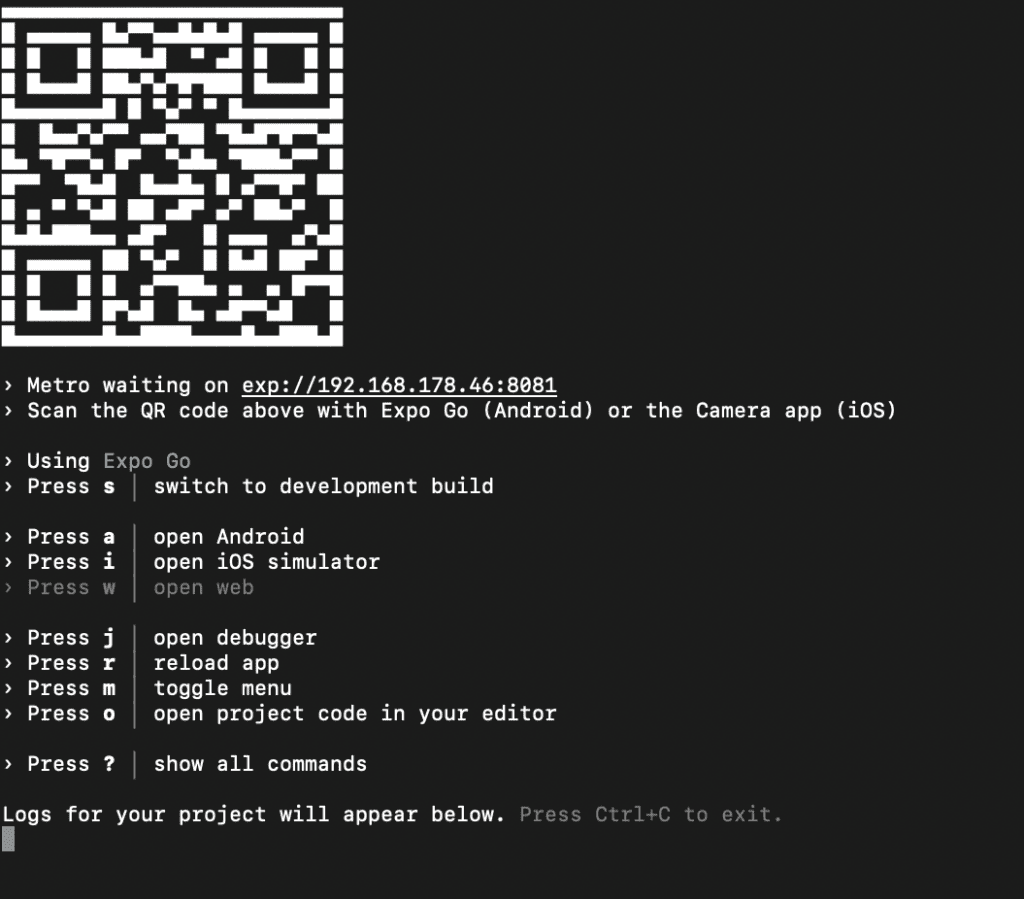
Figure 1 - Expo app QR code.
The initial app that React Native creates will contain a component in the App.js file. Here, you can change the text between the <Text> tags. After saving the changes, Expo automatically updates the view in the simulator or on the device to show the effects immediately.
You now have a fully functional React Native application that can connect to the Mosquitto MQTT Broker in the next steps.
Prepare and check the MQTT broker
To create a React Native MQTT app, you must first prepare the broker. For this purpose, request a free Cedalo MQTT Platform trial to obtain an on-premises license for the Pro edition of Eclipse Mosquitto. The trial includes Persistent Queueing, Audit Trails, MQTT High Availability, and more advanced features. To set up the environment and create a cluster, refer to this step-by-step tutorial.
A few adjustments are necessary to enable the WebSocket protocol. Find the Mosquitto configuration in each server directory (mosquitto/config in the file mosquitto.conf) and add the two following lines:
listener 9001
protocol websockets
In the docker-compose.yml of each server, in addition to port 1833, make port 9001 available for the WebSocket connection. Additionally, adjust the HA proxy config in each server directory under haproxy/haproxy.conf:
global
    daemon
    maxconn 4096

frontend mqtt_frontend
    bind *:1883
    mode tcp
    default_backend mqtt_backend
    timeout client 10m

frontend ws_frontend
    bind *:9001
    mode http
    default_backend ws_backend
    timeout client 10m

backend mqtt_backend
    timeout connect 5000
    timeout server 10m
    mode tcp
    option redispatch
    server m1 172.20.1.1:1883 check on-marked-down shutdown-sessions
    server m2 172.20.1.2:1883 check on-marked-down shutdown-sessions
    server m3 172.20.1.3:1883 check on-marked-down shutdown-sessions


backend ws_backend
    timeout connect 5000
    timeout server 10m
    mode http
    option redispatch
    server m1 172.20.1.1:9001 check on-marked-down shutdown-sessions
    server m2 172.20.1.2:9001 check on-marked-down shutdown-sessions
    server m3 172.20.1.3:9001 check on-marked-down shutdown-sessions
First create a client before implementing the client and server. This can be done in several ways, including the dynamic security feature of the Management Center. For more information, refer to this detailed documentation.
Now, create a simple Node.js client to test the sending and receiving of messages independently of the MQTT React Native app.
Simply install the mqtt package with the command npm install mqtt. Then, use the following script to test the functionality of the Mosquitto instance.
const mqtt = require('mqtt');

const brokerUrl = 'mqtt://127.0.0.1:1883';
const options = {
 username: 'test',
 password: 'secret',
};

const client = mqtt.connect(brokerUrl, options);

client.on('error', (error) => {
 console.log("Can't connect" + error);
 process.exit(1);
});
client.on('connect', () => {
 client.subscribe('presence', (err, granted) => {
   if (granted.qos >= 128) {
     console.log('An error happened');
     return;
   }
   client.publish('presence', 'Hello mqtt');
 });
});

client.on('message', (topic, message) => {
 console.log(message.toString());
 client.end();
});
When you configure a client with the username “test” and password “secret” and save the code in a client.js file, you can check if you can send messages to the broker and receive them again.
Connecting the React Native app with Mosquitto
In JavaScript, there are various ways to solve a problem, in this case establishing a React Native MQTT connection. The simplest and most reliable approach is to use the Eclipse Paho JavaScript client. This is available as an NPM package under the name paho-mqtt.
To install the client in the project, use the command npm install paho-mqtt. The project’s source code is available on Github. This implementation is part of the Paho project and offers a collection of clients for MQTT and MQTT-SN, including implementations for Java, Python, and C, besides JavaScript.
Establishing a connection with Mosquitto requires only three steps:
- Importing the library: To utilize the paho-mqtt package flexibly in different environments, including React Native, use the ECMAScript module system with import and export. To import the package, use a namespace import. It provides all module exports via the specified identifier, which in this case is Paho.
- Instantiate the client: To establish a connection, you must first instantiate the client class by passing the hostname, port number, and client ID (of your choice) to the client class constructor. For local development on a simulator, the hostname is 127.0.0.1. You can select port 9001 to communicate with Mosquitto via the WebSocket protocol. Although you can freely select the client ID, there are certain limitations. For instance, the maximum length is 65535 bytes, but some versions of the specification require a maximum of 23 bytes to be supported. Moreover, the client ID must be valid UTF-8 and has further restrictions such as non-control characters.
- Establish the connection: Pass the client instance’s connect method as a configuration object, which includes various properties. For this project, the two most important properties are onSuccess and onFailure. MQTT works asynchronously due to its pub/sub architecture. This is why most operations are implemented as events and associated handler functions. The onSuccess property contains a callback function that executes if the connection is successful. If an error occurs, the onFailure method will execute instead and provide valuable information for troubleshooting.
These steps are carried out once in the life cycle of a component. The corresponding source code looks like this:
import * as Paho from 'paho-mqtt';


const client = new Paho.Client('127.0.0.1', 9001, 'clientId');


client.connect({
  userName: 'test',
  password: 'secret',
  onSuccess() {
    console.log('Connection established');
  },
  onFailure(error) {
    console.error(error);
  },
});
Here, use the paho-mqtt package instead of the mqtt package, as it can integrate into React Native without additional effort.
Switching to the simulator where the app is running will not show any change to the previous status. However, the “Connection Established” message will appear on the console, indicating a successful connection to Mosquitto.
Sending and receiving messages
After establishing a connection, the next step is to send and receive messages through MQTT. The messages are assigned to topics that clients can receive relevant messages from. These topics have a hierarchical structure, similar to a file system path. Clients can receive more messages by subscribing to a general path. This requires clients to use the multi-level wildcard sign (#) at the path’s end to subscribe to all sub-topics.
There are a few things to account for during active communication via MQTT:
- Connection loss: The client’s onConnectionLost property defines a handler function that executes if the connection to Mosquitto is lost. For example, this allows you to notify the user of the problem.
- Subscribe to topics: The client’s subscribe method defines the topics of interest. If a message is received on this topic, it triggers an event. This activates a handler function in your React Native app, which you can use to process the incoming information.
- Send messages: Use a combination of the message class and the client’s send method to send messages. Simply specify the payload of the message as a string or ArrayBuffer. However, JavaScript objects are not permissible at this point unless you convert them to a JSON string using JSON.stringify() and specify the topic to which the message belongs.
- Receive messages: Analogous to onConnectionLost is the onMessageArrived property, which allows you to implement a handler function for incoming messages.
The following code block shows the implementation of these points:
import * as Paho from 'paho-mqtt';


const client = new Paho.Client('127.0.0.1', 9001, 'clientId');


client.connect({
  userName: 'test',
  password: 'secret',
  onSuccess() {
    console.log('Connection established');
    client.subscribe('my/example/topic');
    message = new Paho.Message('Hello');
    message.destinationName = 'my/example/topic';
    client.send(message);
  },
  onFailure(error) {
    console.error(error);
  },
});


client.onConnectionLost = (responseObject) => {
  if (responseObject.errorCode !== 0) {
    console.error('onConnectionLost:' + responseObject.errorMessage);
  }
};


client.onMessageArrived = (message) => {
  console.log('onMessageArrived:' + message.payloadString);
};
A concrete example
Let’s implement a small example application to demonstrate how the individual components can work together. In this application, a backend sends data at regular intervals, and a React Native app displays it. The backend is a simple Node.js application that sends random temperature and humidity values along with the current timestamp.
MQTT backend implementation
To create the backend in a separate directory:
- Create a package.json file by running
npm init -yon the command line. - Install the mqtt package with the
npm install mqttcommand. - Save the following source code in a file with the name index.js.
const mqtt = require('mqtt');


const brokerUrl = 'mqtt://127.0.0.1:1883';
const options = {
 username: 'test',
 password: 'secret',
};


const client = mqtt.connect(brokerUrl, options);


const MIN_TEMPERATURE = 20;
const MAX_TEMPERATURE = 30;
const MIN_HUMIDITY = 40;
const MAX_HUMIDITY = 60;


function getRandomValue(min, max) {
  return Math.random() * (max - min) + min;
}


client.on('connect', () => {


      setInterval(() => {
        const temperature = getRandomValue(MIN_TEMPERATURE, MAX_TEMPERATURE);
        const humidity = getRandomValue(MIN_HUMIDITY, MAX_HUMIDITY);
        const data = { temperature, humidity, timestamp: Date.now() };
        client.publish('sensors/temperature-humidity', JSON.stringify(data));
      }, 100);


});


function getRandomValue(min, max) {
  return Math.random() * (max - min) + min;
}
Now start the backend with the command node index.js.
Implementing the React MQTT client
The MQTT React Native app component uses effect hooks to establish the connection to Mosquitto. Subscribe to the topic sensors/temperature-humidity in this component. You can update the component’s state and display the information when a new message is received. Limit the number of sensor values displayed to ten to prevent the display from causing problems for the front end. The code of the app component looks like this:
import * as Paho from 'paho-mqtt';
import { View, Text, ScrollView, StyleSheet } from 'react-native';
import { useEffect, useState } from 'react';


export default function App() {
  const  = useState([]);


  useEffect(() => {
    const client = new Paho.Client('127.0.0.1', 9001, 'clientId');
    client.connect({
      userName: 'test',
      password: 'secret',
      onSuccess() {
        client.subscribe('sensors/temperature-humidity');
      },
    });


    client.onMessageArrived = (message) => {
      const payload = JSON.parse(message.payloadString);


      setMessages((prevMessages) => {
        const newMessages = ;
        return newMessages.length > 10 ? newMessages.slice(1) : newMessages;
      });
    };


    return () => {
      client.disconnect();
    };
  }, []);


  return (
    <ScrollView style={styles.container}>
      {messages.map((message, index) => (
        <View key={index} style={styles.messageContainer}>
          <Text style={styles.timestamp}>
            Time: {new Date(message.timestamp).toLocaleString()}
          </Text>
          <View style={styles.dataContainer}>
            <Text style={styles.data}>
              Temperature: {message.temperature.toFixed(2)}°C
            </Text>
            <Text style={styles.data}>
              Humidity: {message.humidity.toFixed(2)}%
            </Text>
          </View>
        </View>
      ))}
    </ScrollView>
  );
}


const styles = StyleSheet.create({
  container: {
    flex: 1,
    paddingTop: 80,
    padding: 10,
  },
  messageContainer: {
    backgroundColor: '#f0f0f0',
    marginBottom: 10,
    padding: 10,
    borderRadius: 5,
  },
  timestamp: {
    fontSize: 16,
    marginBottom: 5,
  },
  dataContainer: {
    flexDirection: 'row',
    justifyContent: 'space-between',
  },
  data: {
    fontSize: 14,
  },
});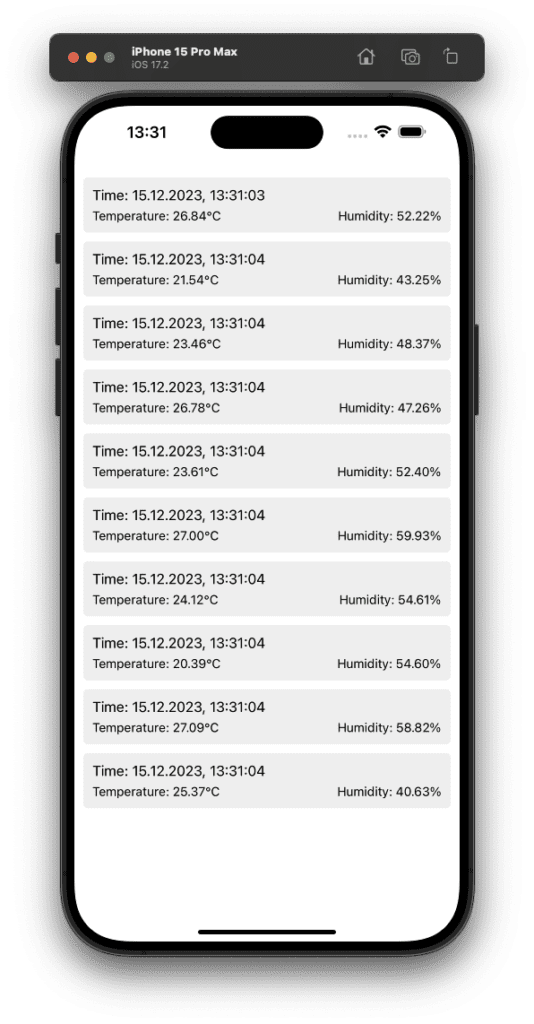
Figure 2 - MQTT React Native app displays temperature and humidity values with the timestamp from the backend.
Wrap-up
MQTT is widely applicable in the IoT environment for exchanging data. Combining MQTT and React Native provides excellent services for apps with a direct IoT link. By connecting a React Native app directly to the Pro Mosquitto broker, you can eliminate additional communication overhead and increase the range of evaluation options.
This article demonstrates just a few possibilities of this combination. For example, you can easily integrate authentication or communicate through an encrypted WebSocket connection and enable automatic connection recovery. This can further expand the scope and functionality of your applications.


