Node.js MQTT Client: Enabling Connection and Usage Example
MQTT is a data protocol based on the flexible publish-subscribe model managed by a broker. It allows you to publish messages on topics.
MQTT is a lightweight protocol often used for devices with low power and bandwidth. You can see examples of its usage in IoT, mobile Internet, intelligent equipment, Internet of Vehicles, energy, and other areas.
Node.JS is a popular asynchronous JavaScript runtime. Technical professionals use it to ensure the operation of server-side applications. It has an event-driven architecture and is suitable for use in real-time web applications. In such applications, using MQTT is a good option for messaging between different clients.
In this article, we discuss how to use Node.js with MQTT. You will learn how to install the necessary software, connect to the broker, post a message, subscribe to a topic, and handle possible errors. Finally, we create a Node.js MQTT example that you can use in your applications.
Setting up a Node.JS MQTT broker project
Prerequisites for working with Node.js MQTT
Let’s start by installing all the necessary tools to create a Node.JS MQTT project.
Install Node.JS
First, check if Node.JS is installed on your computer. To do this, run the following command in the terminal:
node --versionIf you get a version number from executing the command, then Node.JS is installed, and you can proceed to the next step.
Otherwise, download Node.JS and install it on your system.
Install the MQTT.js package
For publishing messages and subscribing to topics on an MQTT broker, we will use the MQTT.js library, which you can use in the Node.js environment and the browser. Install it on your system using the following command:
npm install mqttGet Pro Mosquitto
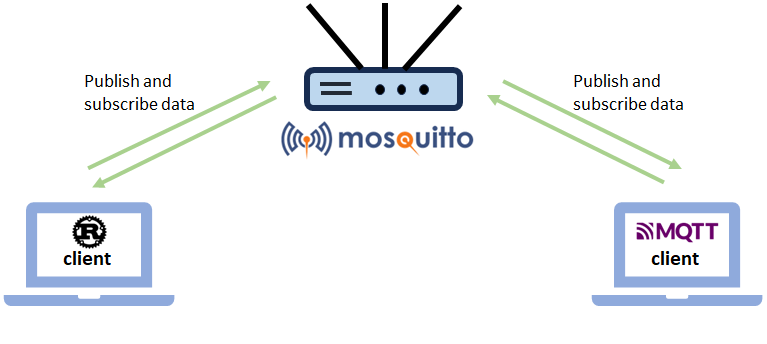
Clients are separate applications that never connect to each other. MQTT broker always handles client connections (Node.JS MQTT server). For the first connection to the broker, the client sends a CONNECT message. Then, the broker returns a CONNACK message and a status code. It is important to note that the broker always keeps the connection active. Disconnection occurs only after the client sends a disconnection event or when the Internet connection is unavailable.
Usually tech professionals use broker to:
- Connect client sessions.
- Receive all messages.
- Determine which client is subscribed to each topic.
- Send messages to subscribers.
Learn more about MQTT broker role here.
In this article, we use the Cedalo MQTT Platform trial to access the Pro Edition for Eclipse Mosquitto broker and the Management Center web UI for quick, stable, and reliable data transmission between devices.
The Pro Edition for Eclipse Mosquitto broker efficiently connects sensors, smartphones, web applications, and other devices while using minimal CPU and RAM resources.
This MQTT broker works without interruption 24/7. In addition, it reliably protects your data and offers tools to manage user access rights based on groups and roles. It provides an easy-to-use and user-friendly web interface for administration and management.
Connect Node.JS to the MQTT broker
First, create a file with the name index.js and import the MQTT.js package into your code:
const mqtt = require('mqtt');To connect to the broker, you can use one of the two methods described below.
Using client URL
const client = mqtt.connect('mqtt://test.mosquitto.org');Using options
Optionally you can pass a second parameter to the connect() method, where you can specify further configurations via a configuration object. In this configuration object, you can set the unique client ID, the username, and the password. In addition, you can specify additional parameters like the last will message, i.e., the message sent to other clients in case a client disconnects ungracefully.
const options = {
    clientId: 'myclient',
    Username: 'cedalo',
    Password: '0dfTYEF90nAd9kNK8IEr'
};
const client = mqtt.connect('mqtt://test.mosquitto.org', options);
Handling the “connect” event
If the connection to the broker is successful, the “connect” event will occur. When this event is triggered, you can initiate the actions you need. For example, publish messages or subscribe to topics. Check out this guide to grasp the essence MQTT topics and how they work.
client.on('connect', () {
    console.log("Connection established successfully!");
});
Publish a message to Node.JS MQTT server
To publish a message in the Node.JS MQTT broker, the client.publish() method is used. Before publishing, I also recommend checking whether the Node.js MQTT client maintains the broker’s connection.
To publish a message, you must specify the name of the topic and the text of the message. There are also additional optional parameters.
const topic = 'topic/name';
const message = 'test message';

client.on('connect', () => {
    console.log(`Is client connected: ${client.connected}`);
    if (client.connected === true) {
        console.log(`message: ${message}, topic: ${topic}`);
        client.publish(topic, message);
    }
});
When a client sends a message to a broker, the broker processes it based on certain criteria. You can specify a QoS (Quality of Service) level, which determines how guaranteed a message is to reach its intended recipients.
The MQTT protocol supports three different types of QoS messages:
- 0 – messages are sent at most once.
- 1 – messages are sent at least once.
- 2 – messages are sent exactly once.
Check out this MQTT QoS article to learn more.
The stage of message processing by the broker involves reading, validating, and identifying clients who have subscribed to topics. After that, the broker sends messages to those MQTT clients that subscribed to these topics.
Subscribe to a topic
You can subscribe to a single topic, an array of topics, topics with a specific setting, or all publishers. Use client.subscribe() method for creating a subscription.
client.on('connect', () => {
    client.subscribe(topic);
});
After you have subscribed to a topic, you need to register an event listener for the “message” event to process the messages sent to it. In the callback function that you pass as the event listener, you then have access to the topic itself and the message:
client.on('message',(topic, message) => {
    console.log(`message: ${message}, topic: ${topic}`);
});
Run the created Node.JS MQTT example
To run the example application, open a command prompt and change to the directory where you have created the file index.js, and then type:
node index.jsThe output shall look like this following the example above:
Is client connected: true
message: test message topic: topic name
You can stop the node MQTT client by pressing ctrl+c.
Handle Node.js MQTT setup errors
To handle errors like unsuccessful connections, you can register event listeners for the “error” event. In the following code example, we register an event listener that prints out the error and terminates the application:
client.on('error',(error) => {
    console.error(error);
    process.exit(1);
});
Full Node.js MQTT example
The complete Node.js MQTT example application code looks like this:
const mqtt = require('mqtt');
const client = mqtt.connect('mqtt://test.mosquitto.org');
const topic = 'topic/name';
const message = 'test message';

client.on('connect', () => {
    console.log(`Is client connected: ${client.connected}`);
    if (client.connected === true) {
        console.log(`message: ${message}, topic: ${topic}`);
        // publish message
        client.publish(topic, message);
    }

    // subscribe to a topic
    client.subscribe(topic);
});

// receive a message from the subscribed topic
client.on('message',(topic, message) => {
    console.log(`message: ${message}, topic: ${topic}`);
});

// error handling
client.on('error',(error) => {
    console.error(error);
    process.exit(1);
});
Key recommendations for using Node.JS MQTT
Now that we have learned how to work with a Node.js MQTT broker, let’s look at the key guidelines for working with Node.js MQTT.
- Use the documentation. If you have any questions when working with the Node.js MQTT broker, read the official documentation, and you may find the answers.
- Use QoS levels greater than 0 only when necessary. MQTT brokers may charge additional fees for these.
Summary
In this article, we have explained how to use MQTT in Node.js. You have learned how to connect to an MQTT broker, post messages, subscribe to a topic, receive messages from a topic, and handle errors. Now you can use the Node.js MQTT broker to exchange messages between different clients in your applications.
For more information on how different Paho libraries work, check out Paho MQTT Client Library with C++ blog post.
About the author
Philipp Struss is a co-founder of Cedalo. He holds a Master's degree in Industrial Engineering and Management, which he earned at the Karlsruhe Institute of Technology (KIT) in Karlsruhe, the Universidad Politécnica de Madrid (UPM) in Madrid, and the University of Cambridge, with a focus on data analytics, manufacturing, and Micro Electro Mechanical Systems (MEMS).
His professional journey includes roles as an analyst in business intelligence at Jedox AG, a process engineer in sensor production at Bosch, and a strategic consultant at McKinsey.
In 2017, he co-founded Cedalo, the company behind Eclipse Mosquitto and Eclipse Streamsheets.


