
The growing number of small Internet of Things (IoT) devices is driving the development of highly integrated, cost and energy-efficient microcontrollers (µC) or systems on a chip (SoC). Espressif, a Chinese manufacturer, offers ESP-Series SoCs which are very popular for IoT applications. Numerous suppliers provide ready-to-use applications or development boards, such as the ESP8266 NodeMCU, a module that could use ESP SoC. The board includes a Wi-Fi antenna, USB connection to power and flash the SoC, and a Wi-Fi module with support for 802.11 b/g/n standards.
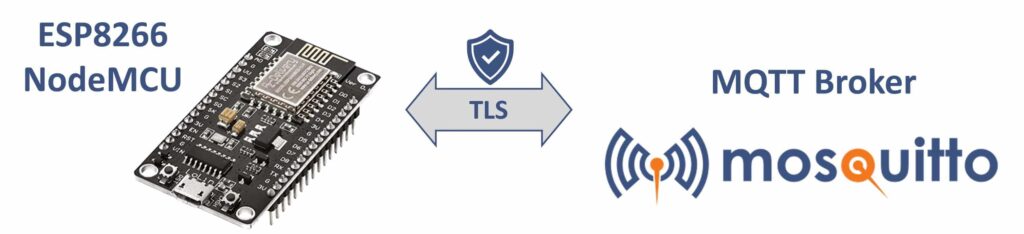
Figure 1. Overview of ESP8266 connection to the Mosquitto MQTT broker
Smart IoT applications with their web interfaces are possible with digital inputs, outputs, and bus interfaces. This project shows a practical application where the NodeMCU ESP8266 retrieves actual power values from solar microinverters and publishes them to MQTT topics for subsequent analysis, visualization, or control via home automation systems.
Software needed to use MQTT on NodeMCU ESP8266
In principle, µC and SoCs don’t have operating systems like Windows or Linux that allow you to run and use client libraries like Paho to connect to MQTT brokers. Instead, you must create and flash firmware onto the device to realize the application. The ESP8266 SoC was released in 2015, and the manufacturer offers the Espressif IoT Development Framework (esp-idf) for software development.
However, beginners may find coding with this framework challenging. Alternatively, you can use the popular Arduino framework, which consists of software libraries and an integrated development environment (IDE) that supports ESP8266. Moreover, you can use Microsoft’s VSCode IDE with the platformIO extension. See the following table for reference:
| Name | SDK / Libraries | IDE |
|---|---|---|
| ESP-IDF | Espressif Systems https://github.com/espressif/esp-idf | Eclipse, VSCode, Common CMake IDEs |
| Arduino | Arduino https://github.com/arduino/library-registry | Arduino 2.0 (main file extension *.ino) |
| PlatformIO | Same as for Arduino | VSCode + PlatformIO Extension |
For this tutorial, I will use the last option because it combines the user-friendly features of the Arduino libraries with the powerful VSCode IDE, which can run as a desktop or browser-based application.
In addition, you can utilize the ready-to-code environment here, and the sample code in your internet browser (you will require a free GitHub account). To use and test the application on an ESP8266 module, adjust the code with your credentials, build the firmware with the command pio run in the IDE, and flash the generated firmware onto the physical device. You can find more details in the code repository.
ESP8266 MQTT example in an IoT Application
The following sections explain a basic program enabling the ESP8266 to connect securely against the Pro Mosquitto to publish and subscribe to topics.
The sample application will showcase simple functionality. Essentially, every time a publisher sends a MQTT message at a specific time, the ESP8266 will post the actual time in synchronization via NTP on another topic.
Requirements for the MQTT Broker
To make use of this functionality, you will need the following:
- A running MQTT broker and the IP address (ipv4 or DNS name).
- Credentials (username/password) to publish and subscribe to topics.
- The X509 certificate of the broker (essential if the connection is over public networks, and I recommend securing it with TLS transport).
The Pro Edition for Eclipse Mosquitto easily fulfills all the above requirements. For a detailed setup guide, refer to the tutorial here. Sign up for a free trial to access a professional and secure version of Mosquitto with an intuitive WebUI.
Configure the C++ Application
The public GitHub repository contains the sample code, all found in the src folder in one main.cpp file.
You’ll first need to configure some variables. For simplicity, the credentials and other settings are hard-coded in this basic sample application.
 1| //#define MQTT_TLS
 2| //#define MQTT_TLS_VERIFY
 3| const char* ssid = "YOUR-WIFI";
 4| const char* password = "YOUR-WIFI-PSK";
 5| const char* mqtt_server = "BROKER";
 6| const uint16_t mqtt_server_port = 1883;
 7| const char* mqttUser = "user";
 8| const char* mqttPassword = "pass";
 9| const char* mqttTopicIn = "esp-8266-in";
10| const char* mqttTopicOut = "esp-8266-out";
The defines in lines 1 and 2 in the code snippet above will be part of the later section, Connect via TLS. The ESP8266 module uses the built-in Wi-Fi to establish a network connection, so you’ll need to configure the station ID (line 3) and the Wi-Fi pre-shared key (line 4).
The variables in lines 5 to 8 define the access to the MQTT broker, where mqtt_server can be either an ipv4 address or a DNS name. In most cases, the port (line 6) should be 1883 for unencrypted MQTT protocol transport and 8883 for encrypted connections.
Note: The Adruino MQTT libraries do not support WebSocket transport.
Lastly, you can choose the topic definitions (lines 9 and 10). However, I recommend picking unique ones to avoid misunderstandings.
ESP8266 Mosquitto MQTT code structure and MQTT client functions
The Arduino framework and libraries require at least two functions in the main code file: setup and loop. As the names suggest, the setup runs once after startup, while the loop function is called periodically after each previous loop call finishes.
Also, you will need a few global variables:
- Includes
#include "Arduino.h"
#include "ESP8266WiFi.h"
#include "PubSubClient.h"
#include "NTPClient.h"
#include "WiFiUdp.h"
#include "certificate.h"- Global variables
11| WiFiClient wifiClient;
12| WiFiUDP ntpUDP;
13| NTPClient timeClient(ntpUDP);
14| PubSubClient mqttClient(wifiClient);- Setup function
15| void setup() {
16|   Serial.begin(115200);
17|   setup_wifi();
18|   mqttClient.setServer(mqtt_server, mqtt_server_port);
19|   mqttClient.setCallback(callback);
20| }- Loop function
21| void loop() {
22|   if (!mqttClient.connected()) {
23|     connect();
24|   }
25|   mqttClient.loop();
26|   timeClient.update();
27| }
In the setup function above, the major calls are the connection setup for MQTT broker (line 18): mqttClient.setServer(mqtt_server, mqtt_server_port) and defining the callback function (line 19): mqttClient.setCallback(callback)
In this case, the latter calls the function every time the client receives a new MQTT message on a subscribed topic from the broker.
In the loop function, mqttClient.loop() (line 25) proceeds the MQTT client communication with the MQTT broker. Thus, to ensure that the local time on ESP8266 is in sync, the function call on line 26 runs to check and correct possible time drifts between the ESP8266 module and NTP servers.
For more details on setting up a secure Paho MQTT Python client, connecting it to a broker, and publishing or subscribing MQTT messages to topics, check out the article here.
To ensure an active connection between the client and the MQTT broker, in lines 22 and 23 check the connection state in every loop. If the connection to the MQTT broker is lost or hasn’t been established, call the connect() function.
You can see the example of the connect() function below:
27| void connect() {
28|   while (!mqttClient.connected()) {
29|     Serial.print("Attempting MQTT connection...");
30|     String mqttClientId = "";
31|     if (mqttClient.connect(mqttClientId.c_str(), mqttUser, mqttPassword)) {
32|       Serial.println("connected");
33|       mqttClient.subscribe(mqttTopicIn);
34|     } else {
35|       Serial.print("failed, rc=");
36|       Serial.print(mqttClient.state());
37|       Serial.println(" will try again in 5 seconds");
38|       delay(5000);
39|     }
40|   }
41| }
The logic in the connect function ensures that connection attempts happen every five seconds if no connection is possible.
The MQTT client callback function on ESP8266
In the sample application below, the callback function handles MQTT communication events and implements the main functionality:
42| void callback(char* topic, byte* payload, unsigned int length) {
43|   Serial.print("Message arrived on topic: '");
44|   Serial.print(topic);
45|   Serial.print("' with payload: ");
46|   for (unsigned int i = 0; i < length; i++) {
47|     Serial.print((char)payload);
48|   }
49|   Serial.println();
50|   String myCurrentTime = timeClient.getFormattedTime();
51|   mqttClient.publish(mqttTopicOut,("Time: " + myCurrentTime).c_str());
52| }
During the reconnect procedure, the ESP8266 subscribes to the topic ‘esp-8266-in’ (refer to lines 9 and 33). Now, whenever an MQTT client publishes a message on this topic, the broker sends it to the ESP8266, triggering the callback function.
As shown in lines 43 to 48, the content of the received message is sent out on the serial interface just as information.
To demonstrate the functionality in line 51, the current time on the ESP8266 module is published on the topic ‘eps-8266-out’ (see line 10 for the topic name definition). For a complete reference, refer to the code here.
Configure the application to use TLS for the ESP8266 MQTT client
In the previous sections, the application was configured without encrypted transport for MQTT payloads. To enable encrypted transport via TLS, simply uncomment line 1 to create a definition named MQTT_TLS. If line 2 remains commented, no certificate verification will occur, accepting any MQTT broker identity.
 1| #define MQTT_TLS
 2| //#define MQTT_TLS_VERIFY
As a result, the code change will trigger two actions. First, the global variable wifiClient is replaced with the secured version WiFiClientSecure wifiClient, ensuring that every transport is now encrypted using TLS.
The second action lies in line 69 in the setup_wifi function (see below). The method wifiClient.setInsecure() forces the client to accept every certificate provided by the broker (server) during the connection parameter negotiation. While the name may sound misleading, TLS still encrypts the transport. However, the only drawback is that it accepts every identity, e.g., invalid or self-signed X509 certificates.
53| void setup_wifi() {
54|   delay(10);
55|   Serial.println();
56|   Serial.print("Connecting to ");
57|   Serial.println(ssid);
58|   WiFi.begin(ssid, password);
59|   while (WiFi.status() != WL_CONNECTED) {
60|     delay(500);
61|     Serial.print(".");
62|   }
63|   timeClient.begin();
64| #ifdef MQTT_TLS
65|   #ifdef MQTT_TLS_VERIFY
66|     X509List *cert = new X509List(CERT);
67|     wifiClient.setTrustAnchors(cert);
68|   #else
69|     wifiClient.setInsecure();
70|   #endif
71| #endif
72|   Serial.println("WiFi connected");
73| }
Enable certificate verification on ESP8266 for MQTT
To secure the ESP8266 module’s configuration with the MQTT broker, you should enable broker identity verification. To enable this, uncomment line 2 in the configuration part of the code so that it looks like the following:
 1| #define MQTT_TLS
 2| #define MQTT_TLS_VERIFY
If the defined MQTT_TLS_VERIFY exists in the code, then the certificate’s validity for TLS encryption is checked. You can see in the setup_wifi function above, lines 66 and 67, that trusted anchors are set for the wifiClient.
In PC-based environments, root certificates, as the name states, serve as the roots of certificate trust paths. Any communication that utilizes valid certificates from the root certificates is, by default, considered trusted. The following figure shows an example trust path for the website www.cedalo.com.
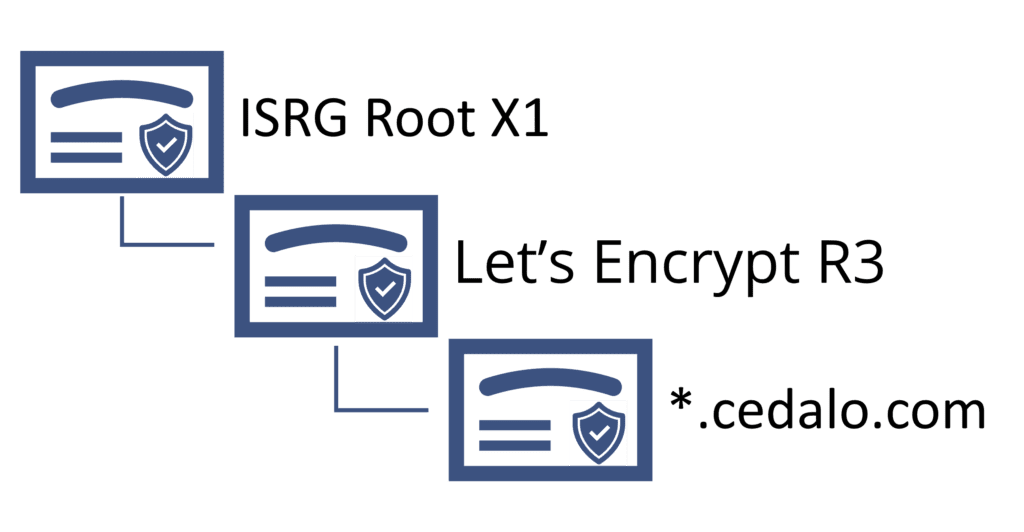
Figure 2: Example of a certificate trust path with ISRG Root X1 root certificate
In the ESP8266, it’s essential to store the public information of trusted certificates to verify the identity of the MQTT broker. While storing hundreds of root certificates is not an issue in PC-based environments, the storage (flash) has its limits in an ESP8266. Consequently, you’ll need to choose specific certificates to limit the need for storage.
Thus, the easiest option is to store the MQTT broker certificate or the certificate of the issuing Certificate Authority (CA). If you use the Pro edition for Eclipse Mosquitto, the corresponding certificate to trust is the Let’s Encrypt R3 intermediate certificate – the sample application stores and provides this certificate by default.
To check or modify the certificate used as a trust anchor in the ESP8266, view or edit the content in the include/certificate.h file in the project folder. However, be careful when changing the lines between BEGIN CERTIFICATE and END CERTIFICATE.
// (re)place the trusted X509 certificate for the tls connection below
// default below: Let's Encrypt R3
const char mqtt_broker_cert[] PROGMEM = R"EOF(
-----BEGIN CERTIFICATE-----
MIIFFjCCAv6gAwIBAgIRAJErCErPDBinU/bWLiWnX1owDQYJKoZIhvcNAQELBQAw
…
nLRbwHOoq7hHwg==
-----END CERTIFICATE-----
)EOF";
After making any changes to the main.cpp or certificate.h project files*,* start a recompilation and firmware creation by using the command pio run in the terminal of the browser-based IDE, or by clicking ‘build’ (if you’re using a local VSCode installation).
Possible issues and troubleshooting
Realizing and debugging applications created for SoC or µC can be challenging. That’s because for debugging, you may need additional hardware and access to logs files or similar helpful resources, which may be limited or unavailable due to a missing operating system environment on the NodeMCU ESP8266.
The following table provides support and troubleshooting tips for any issues that occur. Moreover, refer to the readme section in the sample code repository for instructions on how to monitor the serial output of the ESP8266.
| Output / Behavior | Possible reason / Fix |
|---|---|
| The code compilation fails. (IDE output “build failed”) | Check the compiler’s error messages, which show line numbers and files where the error occurs. Try to fix the code. |
| The creation of the firmware fails. (IDE output “build failed”) | The most common is here missing libraries or wrong paths. In the sample application, this error will be improbable. |
| In the serial output of the ESP8266, the Wi-Fi connection failed | Check the PSK, Wi-Fi SSID and verify if the network is reachable and has sufficient signal strength (refer to the config section in the main code). |
| In the serial output of the ESP8266, the MQTT connection failed | Check the username and password (if needed and set it on the MQTT broker). Is the IP address correct? Can the local Wi-Fi network reach the broker on the defined port? Also, first try to connect without using TLS. |
| MQTT connection works only w/o using TLS | Have you set the port correctly (1883 vs. 8883)? Are the ports reachable (firewall settings in a local Wi-Fi network)? Does the broker support TLS? (check with PC-based clients) If TLS verification is enabled, check that the trusted certificate corresponds to the MQTT broker trust path. If in doubt, use the broker certificate itself in the file _certificate_.h. |


